C & C++: Debug Print like icecream in Python
导言
调试多进程的复杂C++程序的时候,经常会有难以GDB,反而主要依靠简单的print和cout来打印相关信息。这个时候我就想起来python的icecream库1是真的好用。
为此我开始调研C++有没有相关的库,思考一个好用的库应该有哪些功能,具体实现方式应该如何。
理想的设计
- 支持选项开关: 有类似
--debug/--tsj的关键字选项能全局控制debug信息是否输出。为了release版本而去删除debug代码是十分初级的编程方式。 - 支持彩色: 至少能支持 红色、黄色、绿色
- 支持自动打印各种类型的变量及其变量名: 数组向量、整形、指针
- 支持相关上下文信息输出:文件名、代码行数、父函数、时间、第几个输出信息。
- 易用性: 一个简单的头文件
调研已有的开源解决方案
浏览综合awesome-cpp仓库5至少两个比较匹配,基本能实现我想要的效果。
- cpp-dump:支持彩色和自定义数据结构,更全面。但是上手貌似比icecream复杂
- icecream-cpp:作为cpp的类似项目,上手还是一样的味道。但是默认没颜色
icecream-cpp 试用
安装
Makefile 项目:Victima
复制icecream.hpp到sniper/include目录下。在需要使用 IC() 的文件中包含头文件,添加 #include "icecream.hpp"。
功能使用
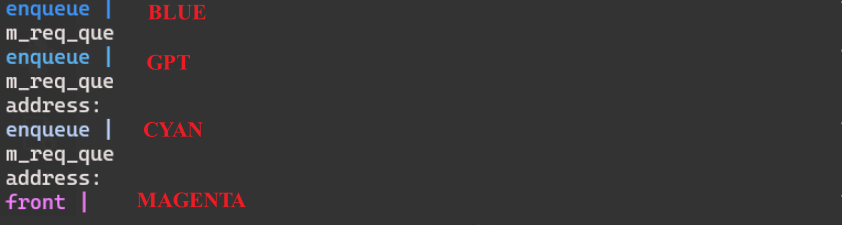
颜色支持: icecream prefix + ANSI转义序列
// 定义一些有颜色的输出宏
#define RESET   "\033[0m"
#define BLACK   "\033[30m"      /* Black */
#define RED     "\033[31m"      /* Red */
#define GREEN   "\033[32m"      /* Green */
#define YELLOW  "\033[33m"      /* Yellow */
#define BLUE    "\033[34m"      /* Blue */
#define MAGENTA "\033[35m"      /* Magenta */
#define CYAN    "\033[36m"      /* Cyan */
#define WHITE   "\033[37m"      /* White */
#define GPT   "\033[94m"      /* gpt-blue */
第一次使用IC()前,设置
拓展:包装颜色函数 + 进程线程信息打印
修改头文件
#define passBY(format, ...) { \
    std::string prefix = std::string(GREEN) + "\n----------------------------- " + format + " -----------------------------\n\n" + std::string(RESET); \
    IC_CONFIG.prefix(prefix.c_str()); \
    IC(__VA_ARGS__); \
    prefix = std::string(YELLOW) + "info | " + std::string(RESET); \
    IC_CONFIG.prefix(prefix.c_str()); \
}

#define errorBY(format, ...) { \
    std::string prefix = std::string(RED) + "-------------- " + format + " --------------\n" + std::string(RESET); \
    IC_CONFIG.prefix(prefix.c_str()); \
    IC(__VA_ARGS__); \
    prefix = std::string(YELLOW) + "info | " + std::string(RESET); \
    IC_CONFIG.prefix(prefix.c_str()); \
}

#define colorBY(color, format, ...) { \
    std::string prefix = std::string(color) + format + " | " + std::string(RESET); \
    IC_CONFIG.prefix(prefix.c_str()); \
    IC(__VA_ARGS__); \
    prefix = std::string(YELLOW) + "info | " + std::string(RESET); \
    IC_CONFIG.prefix(prefix.c_str()); \
}
添加进程线程信息打印
#include <unistd.h>
#include <thread>
#include <sstream>
#include <sys/syscall.h>

#define passBY(format, ...) { \
    pid_t tid = syscall(SYS_gettid); /* 获取系统级 TID */ \
    std::string thread_id_str = std::to_string(tid); \
    std::string prefix = std::string(GREEN) + "\n----------------------------- " + format + " ----------------------------- " \
                        + std::to_string(getpid()) + "/" + thread_id_str + "\n\n" +  std::string(RESET); \
    IC_CONFIG.prefix(prefix.c_str()); \
    IC(__VA_ARGS__); \
    prefix = std::string(YELLOW) + "info " + std::to_string(getpid()) + "/" + thread_id_str + " | " + std::string(RESET); \
    IC_CONFIG.prefix(prefix.c_str()); \
}

#define errorBY(format, ...) { \
    pid_t tid = syscall(SYS_gettid); /* 获取系统级 TID */ \
    std::string thread_id_str = std::to_string(tid); \
    std::string prefix = std::string(RED) + "-------------- " + format + " -------------- " \
                        + std::to_string(getpid()) + "/" + thread_id_str + "\n\n" +  std::string(RESET); \
    IC_CONFIG.prefix(prefix.c_str()); \
    IC(__VA_ARGS__); \
    prefix = std::string(YELLOW) + "info " + std::to_string(getpid()) + "/" + thread_id_str + " | " + std::string(RESET); \
    IC_CONFIG.prefix(prefix.c_str()); \
}

#define colorBY(color, format, ...) { \
    pid_t tid = syscall(SYS_gettid); /* 获取系统级 TID */ \
    std::string thread_id_str = std::to_string(tid); \
    std::string prefix = std::string(color) + format + " " + std::to_string(getpid()) + "/" + thread_id_str  + " | " + std::string(RESET); \
    IC_CONFIG.prefix(prefix.c_str()); \
    IC(__VA_ARGS__); \
    prefix = std::string(YELLOW) + "info " + std::to_string(getpid()) + "/" + thread_id_str + " | " + std::string(RESET); \
    IC_CONFIG.prefix(prefix.c_str()); \
}

#define tIC(...) { \
    pid_t tid = syscall(SYS_gettid); /* 获取系统级 TID */ \
    std::string thread_id_str = std::to_string(tid); \
    std::string prefix = std::string(YELLOW) + "info " + std::to_string(getpid()) + "/" + thread_id_str + " | " + std::string(RESET); \
    IC_CONFIG.prefix(prefix.c_str()); \
    IC(__VA_ARGS__); \
}
复杂结构体无法打印,编译会失败,需要注册
常见简单打印
基本打印
#define debug(...) printf(__VA_ARGS__)

// or complex usage of preprocessor directives in C++
#if !defined(CC_USED__) || CC_USED_ABI_VERSION != __GXX_ABI_VERSION \
       || __GNUC_MINOR__ < CC_USED_MINOR__ \
       || __GNUC_MINOR == CC_USED_MINOR__ && __GNUC_PATCHLEVEL__ < CC_USED_PATCH_LEVEL
   #error This kit requires gcc 3.2.x or 3.3.x with a version >= compiler version of the kit
   #endif
cout 、cerr、clog
C++中都是标准IO库中提供的输出工具:
- cout:写到标准输出的ostream对象;
- cerr:输出到标准错误的ostream对象,常用于程序错误信息;cerr不经过缓冲而直接输出,一般用于迅速输出出错信息
- clog:也是输出标准错误流; clog中的信息存放在缓冲区,缓冲区满或者遇到endl时才输出
Lock iolock;
#if 0
#  define LOCKED(...) { ScopedLock sl(iolock); fflush(stderr); __VA_ARGS__; fflush(stderr); }
#  define LOGID() fprintf(stderr, "[%s] %2u%c [ %2d(%2d)-L%u%c ] %-25s@%3u: ", \
                     itostr(getShmemPerfModel()->getElapsedTime(Sim()->getCoreManager()->amiUserThread() ? ShmemPerfModel::_USER_THREAD : ShmemPerfModel::_SIM_THREAD)).c_str(), \
                     Sim()->getCoreManager()->getCurrentCoreID(), \
                     Sim()->getCoreManager()->amiUserThread() ? '^' : '_', \
                     m_core_id_master, m_core_id, \
                     m_mem_component < MemComponent::L2_CACHE ? 1 : m_mem_component - MemComponent::L2_CACHE+2, \
                     m_mem_component == MemComponent::L1_ICACHE ? 'I' : (m_mem_component == MemComponent::L1_DCACHE  ? 'D' : ' '),  \
                     __FUNCTION__, __LINE__ \
                  );
#  define MYLOG(...) LOCKED(LOGID(); fprintf(stderr, __VA_ARGS__); fprintf(stderr, "\n");)
#  define DUMPDATA(data_buf, data_length) { for(UInt32 i = 0; i < data_length; ++i) fprintf(stderr, "%02x ", data_buf[i]); }
#else
#  define MYLOG(...) {}
#endif

// Usage
MYLOG("processMemOpFromCore l%d before next", m_mem_component);
// 输出样例
[384615] 0^ [ 0( 0)-L1D ] processMemOpFromCore @643: processMemOpFromCore l3 before next
// 时间: 384615
// coreid: 0
// 父核?以及id?:0,0
// 哪一级缓存:L1D
// 函数名:processMemOpFromCore
// 行号:643
// 具体内容:processMemOpFromCore l3 before next
及时输出的解释
这段C++代码定义了一组宏,用于调试和记录日志,尤其是在多线程环境中锁定和记录I/O操作。这里是中文解释:
-
定义锁对象:
这行代码定义了一个名为iolock的锁对象,用于同步对I/O资源的访问,防止多线程同时操作导致数据竞争或不一致。 -
条件编译宏:
这里使用预处理指令#if 0来条件性地编译代码。因为条件为0,所以在正常编译时,定义在#if和#else之间的代码不会被包括在最终的程序中。 -
锁定和日志记录宏:
这个宏定义一个局部作用域锁ScopedLock sl(iolock),自动锁定并在作用域结束时解锁。在执行用户提供的命令(__VA_ARGS__)前后,会刷新标准错误流stderr以确保输出的即时性。 -
记录日志的标识:
LOGID宏负责在stderr上打印一个日志标识符,包括时间、核心ID、线程类型、缓存信息、函数名和代码行号。 -
记录日志的宏:
MYLOG宏使用LOCKED宏来确保日志记录的线程安全。它首先调用LOGID()输出日志标识,然后输出自定义的日志信息,并在最后添加换行符。 -
输出数据缓冲区的宏:
# define DUMPDATA(data_buf, data_length) { for(UInt32 i = 0; i < data_length; ++i) fprintf(stderr, "%02x ", data_buf[i]); }DUMPDATA宏用于遍历并在stderr上以十六进制格式打印数据缓存。 -
禁用日志的宏:
如果条件编译为非零(即不是通过#if 0的路径),MYLOG宏被定义为空操作,这意味着在正式编译的程序中不会执行任何日志记录操作。
这些宏主要用于调试和性能分析,通过详细的日志可以帮助开发者了解程序的运行状态和可能的问题点。
触发器: 如何在函数结束,程序结束时,触发打印信息函数
在程序开始时,通过系统提供的atexit(),向系统注册一个回调函数,在程序调用exit()退出的时候,这个回调函数就会被调用。atexit()用来设置一个程序正常结束前调用的函数. 当程序通过调用exit()或从main 中返回时, 参数function 所指定的函数会先被调用, 然后才真正由exit()结束程序.
atexit 函数可以“注册”一个函数,使这个函数将在main函数正常终止时被调用,当程序异常终止时,通过它注册的函数并不会被调用。
atexit是注册的函数和函数入栈出栈一样,是先进后出的,先注册的后执行。
#include <stdlib.h>
void my_exit(void)
{
    printf("before exit () !\n");
}
main()
{
    atexit (my_exit);
    exit(0);
}
对于函数结束时,结构体,类消除触发函数
struct AfterReturn {
    ~AfterReturn() {
        // This code will run when an AfterReturn object goes out of scope
        cout << "after return" << endl;
    }
};

int foo() {
    AfterReturn guard; // This variable goes out of scope on return
    cout << "returning..." << endl;
    return 5;
    // This is when the destructor of "guard" will be executed
}

int main() {
    cout << foo() << endl;
    return 0;
}

//The above program prints
returning...
after return
5
相关信息获取与打印
打印调用栈
读到过的项目Victima里的实现
通过在main()里调用exceptions.cc的registerExceptionHandler();
即可实现如下效果
------------------------------------------------------------
Segmentation fault. Access Address = 0x18

Backtrace:
cache_cntlr.h:ParametricDramDirectoryMSI::CacheCntlr::getCache:390
subsecond_time.h:SubsecondTime::operator+=:91
subsecond_time.h:SubsecondTime::SubsecondTime:70 (discriminator 4)
memory_manager.cc:ParametricDramDirectoryMSI::MemoryManager::performAddressTranslation:968
memory_manager.cc:ParametricDramDirectoryMSI::MemoryManager::coreInitiateMemoryAccess:880
core.cc:Core::initiateMemoryAccess:391
core.cc:Core::readInstructionMemory:267
subsecond_time.h:SubsecondTime::divideRounded:197
performance_model.cc:PerformanceModel::iterate:309
trace_thread.cc:TraceThread::run:919
pthread_thread.cc:PthreadThread::spawnedThreadFunc:21
??:??:0
??:??:0
------------------------------------------------------------
浏览了awesome-cpp仓库5,感觉下面两个仓库比较elegant:
- backward-cpp : 能让程序SegFault时,自动彩色打印更多的相关信息
- cpptrace: 提供函数,在任意处彩色打印当前的函数栈
cpptrace
较推荐: Cmake下载lib使用简单;API 简单
// 生成堆栈追踪
cpptrace::stacktrace trace = cpptrace::generate_trace();

std::ostringstream oss;
trace.print_with_snippets(oss);
backward-cpp 库安装
过时:简单场景segFault,,复杂时明明有-g选项但是无法打印详细信息,并且严重依赖包
由于要get trace, 需要安装相关trace包的支持,官方提供很多种方式,这里选择 libdw from the elfutils6
# 安装第三方库
sudo apt-get install libdw-dev
# CentOS
sudo yum install elfutils-libelf-devel elfutils-devel
- 传统: 在代码库中添加 backward.cpp 和 backward.hpp, 并加入编译流程。但是复杂项目可能makefile比较复杂
- 简单: 因为 backward.cpp 只有四行,也可以直接写在项目的某个cpp里。然后backward.hpp扔到 /usr/include 也是可行的方案
// 取消 backward.cpp 对应的注释,来提醒backward.hpp使用哪种库来实现
#define BACKWARD_HAS_DW 1

#include "backward.hpp"
namespace backward {
    backward::SignalHandling sh;
} // namespace backward
除此之外,还要编译时添加库, 修改Makefile类似LD_LIBS += -ldw的部分。cmake添加target_link_libraries(my_executable -ldw)
Release下某几层函数符号消失
#7    Object "/home/anaconda3/envs/t00906153_bindCore/lib/python3.8/site-packages/torch/lib/libtorch_cpu.so", at 0xffff792072fb, in torch::autograd::Engine::thread_init(int, std::shared_ptr<torch::autograd::ReadyQueue> const&, bool)
#6    Object "/home/anaconda3/envs/t00906153_bindCore/lib/python3.8/site-packages/torch/lib/libtorch_cpu.so", at 0xffff7920f1b3, in torch::autograd::Engine::thread_main(std::shared_ptr<torch::autograd::GraphTask> const&)
#5    Object "/home/anaconda3/envs/t00906153_bindCore/lib/python3.8/site-packages/torch/lib/libtorch_cpu.so", at 0xffff79205f7b, in torch::autograd::set_device(int)
#4    Object "/home/anaconda3/envs/t00906153_bindCore/lib/python3.8/site-packages/torch_npu/lib/libtorch_npu.so", at 0xffff3785d98f, in
#3    Object "/home/anaconda3/envs/t00906153_bindCore/lib/python3.8/site-packages/torch_npu/lib/libtorch_npu.so", at 0xffff3785d723, in
#2    Object "/home/anaconda3/envs/t00906153_bindCore/lib/python3.8/site-packages/torch_npu/lib/libtorch_npu.so", at 0xffff3790c9e3, in c10_npu::SetDevice(signed char)
#1    Object "/home/anaconda3/envs/t00906153_bindCore/lib/python3.8/site-packages/torch_npu/lib/libtorch_npu.so", at 0xffff378daf47, in
#0    Object "/home/anaconda3/envs/t00906153_bindCore/lib/python3.8/site-packages/torch_npu/lib/libtorch_npu.so", at 0xffff37941837, in
修改为debug模式编译。
#7    Object "/home/anaconda3/envs/t00906153_bindCore/bin/python3.8", at 0x42be83, in function_code_fastcall
#6    Object "/home/anaconda3/envs/t00906153_bindCore/bin/python3.8", at 0x433cb7, in _PyEval_EvalFrameDefault
#5    Object "/home/anaconda3/envs/t00906153_bindCore/bin/python3.8", at 0x4716bb, in cfunction_vectorcall_NOARGS
#4    Object "/home/anaconda3/envs/t00906153_bindCore/lib/python3.8/site-packages/torch_npu/lib/libtorch_npu.so", at 0xfffdc51e6d57, in THNPModule_initExtension(_object*, _object*)
#3    Object "/home/anaconda3/envs/t00906153_bindCore/lib/python3.8/site-packages/torch_npu/lib/libtorch_npu.so", at 0xfffdc4788433, in c10_npu::NpuSysCtrl::Initialize(int)
#2    Object "/home/anaconda3/envs/t00906153_bindCore/lib/python3.8/site-packages/torch_npu/lib/libtorch_npu.so", at 0xfffdc47592cf, in c10_npu::SetDevice(signed char)
#1    Object "/home/anaconda3/envs/t00906153_bindCore/lib/python3.8/site-packages/torch_npu/lib/libtorch_npu.so", at 0xfffdc475810f, in c10_npu::SetThreadAffinity(signed char)
#0    Object "/home/anaconda3/envs/t00906153_bindCore/lib/python3.8/site-packages/torch_npu/lib/libtorch_npu.so", at 0xfffdc4757407, in printStack()
无法显示具体代码行
这要求所有的中间文件到最终.so或者可执行文件,包含符号表。
- 一方面,使用DEBUG编译,并且
-O0 -g; - 另一方面,需要学习使用
nm或者objdump来验证每一步的编译的中间包含符号信息。
backward-cpp 使用与拓展
利用backward可以很方便的打印当前的函数栈。在阅读结果的时候,和GDB的显示顺序是反的,最后面的是最深处出错的地方。
#include "backward.hpp"

void printStack(){
    using namespace backward;
    StackTrace st;
    st.load_here(32); // record the current function stack
    Printer p;
    p.object = true;
    p.color_mode = ColorMode::always;
    p.address = true;
    p.print(st, stderr);
}
printStack写到hpp、cpp里
...
#endif // BACKWARD_SYSTEM_UNKNOWN

} // namespace backward

void printStack();

#endif /* H_GUARD */
和
#define BACKWARD_HAS_DW 1
#include "backward.hpp"
namespace backward {
    backward::SignalHandling sh;
} // namespace backward

void printStack(){
    using namespace backward;
    StackTrace st; st.load_here(32);
    Printer p;
    p.object = true;
    p.color_mode = ColorMode::always;
    p.address = true;
    p.print(st, stderr);
}
#define tsjStack失败
如下设置会出现两个问题,1. 无法解析出函数栈,只能显示二进制。2. 有兼容性问题,会segFault。具体原因有待进一步研究。
打印堆栈时,可能会出现丢失某一层函数调用的问题
如下,如果不在prfmdl->iterate();前写passBY("performance model simulate iterate");这层函数调用就消失了。这可能和编译选项有关。
------------------------------
#12 Object "/root/Victima/sniper/lib/sniper", at 0x49a938, in TraceThread::run()
Source "/root/Victima/sniper/common/trace_frontend/trace_thread.cc", line 921, in run [0x49a938]
918: break;
919:
920: case InstMode::DETAILED:
> 921: handleInstructionDetailed(inst, next_inst, prfmdl);
922: break;
923:
924: default:
------------------------------

------------------------------
#11 Object "/root/Victima/sniper/lib/sniper", at 0x498f6d, in TraceThread::handleInstructionDetailed(Sift::Instruction&, Sift::Instruction&, PerformanceModel*)
Source "/root/Victima/sniper/common/trace_frontend/trace_thread.cc", line 768, in handleInstructionDetailed [0x498f6d]
766: // simulate
767: passBY("performance model simulate iterate");
> 768: prfmdl->iterate();
769: }
770:
771: void TraceThread::addDetailedMemoryInfo(DynamicInstruction *dynins, Sift::Instruction &inst, const dl::DecodedInst &decoded_inst, uint32_t mem_idx, Operand::Direction op_type, bool is_prefetch, PerformanceModel *prfmdl)
------------------------------

------------------------------
#10 Object "/root/Victima/sniper/lib/sniper", at 0x45543b, in PerformanceModel::iterate()
Source "/root/Victima/sniper/common/performance_model/performance_model.cc", line 309, in iterate [0x45543b]
306: LOG_ASSERT_ERROR(!ins->instruction->isIdle(), "Idle instructions should not make it here!");
307:
308: if (!m_fastforward && m_enabled)
> 309: handleInstruction(ins);
310:
311: delete ins;
------------------------------
打印seg fault,默认没有颜色, 需要略微修改header
虽然上面的printStack()能正常的显示颜色,但是segfault却不会。
阅读头文件,class SignalHandling通过和signal触发的钩子函数绑定来实现,添加printer.color_mode = ColorMode::always;
由于打印了更多的信息,理应分离每级的函数栈,多显示些换行
修改头文件的class Printer
template <typename ST>
void print_stacktrace(ST &st, std::ostream &os, Colorize &colorize) {
    print_header(os, st.thread_id());
    _resolver.load_stacktrace(st);
    if ( reverse ) {
    for (size_t trace_idx = st.size(); trace_idx > 0; --trace_idx) {
        os << "\n------------------------------\n";
        print_trace(os, _resolver.resolve(st[trace_idx - 1]), colorize);
        os << "------------------------------\n";
    }
    } else {
    for (size_t trace_idx = 0; trace_idx < st.size(); ++trace_idx) {
        os << "\n\n------------------------------\n";
        print_trace(os, _resolver.resolve(st[trace_idx]), colorize);
        os << "------------------------------\n";
    }
    }
}

template <typename IT>
void print_stacktrace(IT begin, IT end, std::ostream &os, size_t thread_id,
                        Colorize &colorize) {
    print_header(os, thread_id);
    for (; begin != end; ++begin) {
    os << "\n------------------------------\n";
    print_trace(os, *begin, colorize);
    os << "------------------------------\n";
    }
}
打印当前函数
https://blog.csdn.net/cabinriver/article/details/8960119
#include <cstdio>

//定义打印宏,并在打印信息前加入文件名、行号、函数名

//此宏展开后,类似于printf("123"),printf("456");
#define TRACE_CMH_1 (printf("%s(%d)-<%s>: ",__FILE__, __LINE__, __FUNCTION__), printf)

//此宏展开后,类似于printf("%d""%d", 1, 2);
#define TRACE_CMH_2(fmt,...) \
    printf("%s(%d)-<%s>: "##fmt, __FILE__, __LINE__, __FUNCTION__, ##__VA_ARGS__)

//注:由于第一个宏TRACE_CMH_1调用了两次printf,所以效率没有第二个宏高。
//如果编译器支持C99标准的话,可以用第二个宏。
段错误定位
在python调用c++的场景时,GDB有时候只能定位到python的字节码一层。为此我们需要再c++侧假如segfault监控。
主线程设置,多线程环境也生效
信号是向进程发送的,而不是向特定线程发送的,因此,一旦一个信号(比如 SIGSEGV)被触发,所有线程都会收到这个信号。如果你在主线程中设置了信号处理器,那么这个处理器会对所有线程生效。
#include <csignal>
#include <iostream>
#include <execinfo.h>
#include <unistd.h>

void signal_handler(int sig) {
    std::cerr << "Caught signal " << sig << std::endl;

    // 打印堆栈跟踪信息
    void *array[10];
    size_t size = backtrace(array, 10);
    char **symbols = backtrace_symbols(array, size);

    for (size_t i = 0; i < size; i++) {
        std::cerr << symbols[i] << std::endl;
    }
    free(symbols);

    // 终止程序
    std::_Exit(1);  // 直接退出程序,不返回到信号处理函数外
}

void thread_func() {
    // 模拟段错误
    int *ptr = nullptr;
    *ptr = 42;  // 触发段错误
}

int main() {
    // 设置信号处理器
    signal(SIGSEGV, signal_handler);

    // 创建多个线程
    std::thread t1(thread_func);
    std::thread t2(thread_func);

    t1.join();
    t2.join();

    return 0;
}