跳转至

Tutorials

Python Graph & Visualization

数据科学

matplotlib

基础语法与概念

plotly

matplotlib VS plotly

  1. matplotlib can use custom color and line style
  2. plotly is more easily to quickly built up.

基础语法与概念

线性颜色柱的选择

https://plotly.com/python/builtin-colorscales/

same in matplotlib

plt.show 转发图像到本地

使用Dash: A web application framework for your data., 默认部署在localhost:8050端口

本地机器打通ssh隧道

ssh -L 8050:127.0.0.1:8050 -vN -f -l shaojiemike 202.38.72.23

科研画图

In scientific research plotting, it's always bar charts instead of line charts.

Possible reasons:

  1. The visual footprint of point lines is relatively small compared to bar
  2. Line charts are aggregated together when there is a meaningful comparison of data along the y-axis.

global setting

font things, Attention, global settings have higher priority to get work

matplotlib.rcParams.update({
    "pgf.texsystem": "pdflatex",
    'font.family': 'serif',
    # 'text.usetex': True, # comment to support bold font in legend, and font will be bolder
    # 'pgf.rcfonts': False,
})

layout

  1. picture size

  1. figure size (adjust x,y tick distance)
# mpl
fig.set_size_inches(w= 0.5 * x_count * (group_count+1.5), h=5.75 * 0.8) #(8, 6.5)

# plotly
fig.update_layout(height=350, width=50 * graph_data.size(),
                  margin=dict(b=10, t=10, l=20, r=5),
                  bargap=0.2 # x tick distance, 1 is the normalize-distance of adjacent bars
                  )
  1. relative position
# mpl: Adjust the left margin to make room for the legend, left & right chart vertical line position from [0,1]
plt.subplots_adjust(left=0.1, right=0.8)

set x axis

# mpl:
x = np.arange(len(graph_data.x))  # the label locations, [0, 1, 2, 3, 4, 5, 6, 7]
# set the bar move to arg1 with name arg2
ax.set_xticks(x + (group_count-1)*0.5*width, graph_data.x)
plt.xticks(fontsize=graph_data.fontsize+4)
# Adjust x-axis limits to narrow the gap
plt.xlim(-(0.5+gap_count)*width, 
        x_count - 1 + (group_count-1)*width + (0.5+gap_count)*width)


# plotly

set y axis

  1. vertical grid line
  2. dick size
  3. and range size
# mpl
ax.set_ylabel(yaxis_title, 
              fontsize=graph_data.fontsize,
              fontweight='bold')
plt.grid(True, which='major',axis='y', zorder=-1.0) # line and bar seems need to set zorder=10 to cover it
plt.yticks(np.arange(0, max_y ,10), fontsize=graph_data.fontsize) # step 10
plt.yscale('log',base=10) # or plt.yscale('linear')
ax.set_ylim(0.1, max_y)
## highlight selected y-label: https://stackoverflow.com/questions/73597796/make-one-y-axis-label-bold-in-matplotlib

# plotly
fig.update_layout(
      yaxis_range=[0,maxY],                   
      yaxis=dict(
          rangemode='tozero',  # Set the y-axis rangemode to 'tozero'
          dtick=maxY/10,
          gridcolor='rgb(196, 196, 196)', # grey
          gridwidth=1,
      ),
)

Bolden Contour Lines

  1. Entire Figure
# mpl ?

# plotly: Add a rectangle shape to cover the entire subplot area
fig.add_shape(type="rect",
            xref="paper", yref="paper",
            x0=0, y0=0,
            x1=1, y1=1,
            line=dict(color="black", width=0.7))
  1. and Each Bar Within
# mpl: Create a bar chart with bold outlines
plt.bar(categories, values, edgecolor='black', linewidth=2)

# plotly: ?

legend box

# mpl: 
ax.legend(loc='upper left', ncols=3, fontsize=graph_data.fontsize)
# legend out-of-figure, (1.02, 1) means anchor is upper right corner
plt.legend(loc='upper left', bbox_to_anchor=(1.02, 1), borderaxespad=0)

# Calculate the legend width based on the figure width
fig_size = plt.gcf().get_size_inches()
fig_width = fig_size[0]
# Move the legend to the center above the ceiling line
plt.legend(loc='upper center', bbox_to_anchor=(0.5, 1.1), 
  ncol=2,  # ncol=2 to have labels in one line
  frameon=False,  # frameon=False removes the legend box outline
  columnspacing=fig_width, # distance between each label
  handlelength=1.0, # label-box width (unit is text fontsize)
  handleheight=1.0, # label-box heigh (unit is text fontsize)
  prop={'size': 20, 'weight': 'bold'} # text fontsize          
) 

bar

# mpl: white hugo hatch with black bar edge.
# Problem: because the bug of mpl. hatch color follow the edge color
# Solved: draw bar twice, first the white hugo hatch with white bar edge. Second empty figure with black bar edge.
# white doubel ref: https://stackoverflow.com/questions/38168948/how-to-decouple-hatch-and-edge-color-in-matplotlib
# ref2: https://stackoverflow.com/questions/71424924/how-to-change-the-edge-color-of-markers-patches-in-matplotlib-legend
color_palette = ['black', (193/255, 1/255, 1/255), 'w', (127/255, 126/255, 127/255), 'blue']
pattern_list = ["", "/", "+", "\\", "x"]
edgecolor_list = ['w', 'w', (0/255, 176/255, 80/255), 'w', 'w']

ax.bar(x + offset, measurement, width, label=species_name,
                       color=color_palette[idx],
                        hatch = pattern_list[idx],
                        edgecolor=edgecolor_list[idx],
                        linewidth=1,
                     )
ax.bar(x + offset, measurement, width, label=species_name,
            color = "none",
            edgecolor='black', linewidth=1,
              )
# related legend: https://stackoverflow.com/questions/71424924/how-to-change-the-edge-color-of-markers-patches-in-matplotlib-legend
handles1, labels1 = ax.get_legend_handles_labels()
plt.legend([handles1[2*idx]+handles1[2*idx+1] for idx in range(group_count)], 
            [labels1[2*idx] for idx in range(group_count)],  
            loc='upper center', bbox_to_anchor=(0.5, 1.12), 
            ncol=group_count,  # have labels in one line
            frameon=False,
            # bbox_transform=plt.gcf().transFigure,
            columnspacing=legend_width, 
            # handlelength=1.0, 
            handleheight=1.2, 
            prop={'size': graph_data.fontsize,
                'weight': 'heavy'}
) 


# plotly: find the overflow
overflow_pattern = ["/" if y > maxY  else "" for y in entry[1]]
fig.add_bar(x=x,y=yList, 
    name=barName, 
    marker=dict(
        color=color_list[i],
        pattern_shape = overflow_pattern,
        line=dict(color='black', width=2)
        ),
    textfont=dict(size=graph_data.fontsize),
)
# legend 
legend_num = len( barDict.items())
fig.update_layout(barmode="relative", 

        # legend_title="Legend Title",
        legend = dict(
          entrywidthmode='fraction', # https://plotly.com/python/legend/
          entrywidth= 0.2,
          x=0.5 - 0.5 * legend_num * 0.2,        # Set x to 0.5 for the center
          y=1.2,       # Set y to a value greater than 1 to move it above the plot
          orientation="h",  # Display legend items in a single line
        ),
)

Out-box text

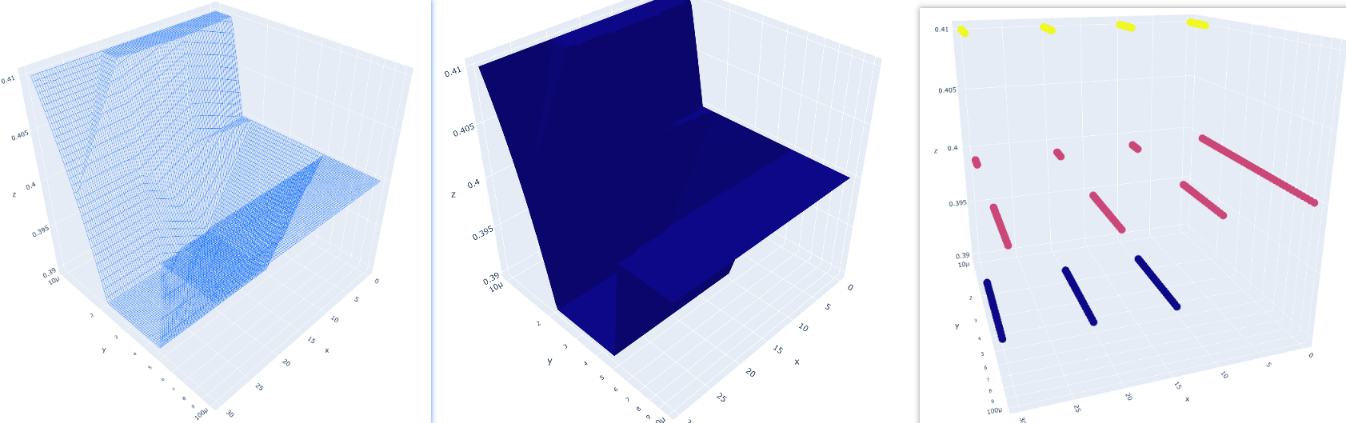
To draw symmetry chart, we need to special highlight the overflow bar number.

If the ancher point locate in the plot box, it's easy to show text above the ceil line using textposition="bottom" like option. In the opposite scenario, plotly and mathplotlib all will hide the out-box text.

# plotly
fig.add_annotation(
            x=[x[0][i],x[1][i]],  # 注释的 x 坐标为 "bc"
            y=min(maxY,entry),  # 注释的 y 坐标为该列的最大值
            text=f"{entry:.2f}",  # 注释的文本内容
            # valign = "bottom", # text position in text box(default invisible)
            yanchor = "bottom", # text box position relative to anchor
            showarrow=False,  # 显示箭头
            # bgcolor="rgba(255, 255, 255, 0.8)",  # 注释框背景颜色
            font=dict(size=graph_data.fontsize+2)  # 注释文本字体大小
        )

# mathplotlib
# Create labels for overflowed values
for i, value in enumerate(values):
    if value > maxY:
        ax.annotate(f'Overflow: {value:.2f}', (i, maxY), ha='center', va='bottom', fontsize=12)

But mlb can write text out box.

ax.text(1, -1.6, 'Increasing', ha="center")

# first parameter is text, xy is the anchor point, xytext is the text, 
# xytext 2 xy is a relative distance
ax.annotate('yahaha', xy=(0, -0.1), xycoords='axes fraction', xytext=(1, -0.1))

out-box line

mathplotlib(mpl) can achieve this using ref, but there are few blogs about plotly.

# mpl: from 1*1 size full-graph (0.5,0.2) to point (1,0.8)
# transform=gcf().transFigure : gcf() stands for "get current figure," and .transFigure indicates that the coordinates provided in [0.5, 0.5], [0, 1] are in figure-relative coordinates. This means that the line's position is defined relative to the entire figure, not just the axes
# clip_on=False : This setting means that the line is not clipped at the edges of the axes. It allows the line to extend beyond the axes' boundaries.
from pylab import *  
plot([0.5, 1], [0.2, 0.8], color='lightgreen', linestyle='--', lw=1 ,transform=gcf().transFigure, clip_on=False)

# mpl: arrow from xy 2 xytext
# xycoords='figure fraction' to Add annotation to the figure (full graph)
ax.annotate('', xy=(0, -0.1), xycoords='axes fraction', xytext=(1, -0.1),\
arrowprops=dict(arrowstyle="->", color='violet'))

in-box line

# mpl:
ax.axhline(y=12, color='red', linestyle='--', label='Horizontal Line at y=12')
ax.axvline(x=3, color='green', linestyle='-.', label='Vertical Line at x=3')

# plotly ref: https://plotly.com/python/horizontal-vertical-shapes/
fig.add_vline(x=2.5, line_width=3, line_dash="dash", line_color="green") # dot
fig.add_hline(y=0.9)

实践

气泡图

二维无向图

教程

3D图

dash + plotly

如果防火墙是关闭的,你可以直接部署在external address上。使用docker也是可行的办法

app.run_server(debug=True, host='202.38.72.23')

3D 散点图,拟合曲面与网格图

实际案例

折线图

import matplotlib.pyplot as plt

X = [str(i) for i in metricValue]
Y = accuracyResult

# 设置图片大小
fig, ax = plt.subplots(figsize=(10, 6))  # 指定宽度为10英寸,高度为6英寸

plt.plot(X, Y, marker='o')
plt.xlabel('Threshold Percentage(%)', fontsize=12)  # 设置x轴标签字体大小为12
plt.ylabel('Average Execution Time of Static Method', fontsize=12)  # 设置y轴标签字体大小为12
plt.title('Tuning load store pressure', fontsize=14)  # 设置标题字体大小为14

for i in range(len(X)):
    plt.text(X[i], Y[i], Y[i], 
        fontsize=10, # 设置文本字体大小为10
        ha='center', # 设置水平对齐方式
        va='bottom')  # 设置垂直对齐方式

# 保存图片
plt.savefig(glv._get("resultPath") + f"tuning/{tuningLabel}/loadStorePressure.png", dpi=300)  # 设置dpi为300,可调整保存图片的分辨率

plt.show()  # 显示图片
plt.close()

Heatmap

实例

Stacked Bar & grouped compare bar

Example

Error Bars

在柱状图中,用于表示上下浮动的元素通常被称为"误差条"(Error Bars)。误差条是用于显示数据点或柱状图中的不确定性或误差范围的线条或线段。它们在柱状图中以垂直方向延伸,可以显示上下浮动的范围,提供了一种可视化的方式来表示数据的变化或不确定性。误差条通常通过标准差、标准误差、置信区间或其他统计指标来计算和表示数据的浮动范围。

Errorbars + StackedBars stacked 的过程中由于向上的error线的会被后面的Bar遮盖,然后下面的error线由于arrayminus=[i-j for i,j in zip(sumList,down_error)]导致大部分时间说负值,也不会显示。

fig = go.Figure()

 # color from https://stackoverflow.com/questions/68596628/change-colors-in-100-stacked-barchart-plotly-python
 color_list = ['rgb(29, 105, 150)', \
             'rgb(56, 166, 165)', \
    'rgb(15, 133, 84)',\
          'rgb(95, 70, 144)']
 sumList = [0 for i in range(len(x[0]))]
 for i, entry in enumerate( barDict.items()):
  barName=entry[0]
  yList = entry[1]
  ic(sumList,yList)
  sumList = [x + y for x, y in zip(yList, sumList)]
  fig.add_bar(x=x,y=yList, 
              name=barName, 
              text =[f'{val:.2f}' for val in yList], 
              textposition='inside',
              marker=dict(color=color_list[i]),
              error_y=dict(
    type='data',
    symmetric=False,
    color='purple',
    array=[i-j for i,j in zip(up_error,sumList)],
    arrayminus=[i-j for i,j in zip(sumList,down_error)],
       thickness=2, width=10),
              textfont=dict(size=8)
  )

Candlestick

类似股票上下跳动的浮标被称为"Candlestick"(蜡烛图)或"OHLC"(开盘-最高-最低-收盘)图表。

需要进一步的研究学习

暂无

遇到的问题

暂无

开题缘由、总结、反思、吐槽~~

参考文献

上面回答部分来自ChatGPT-3.5,暂时没有校验其可靠性(看上去貌似说得通)。

[1] Saket, B., Endert, A. and Demiralp, Ç., 2018. Task-based effectiveness of basic visualizations.IEEE transactions on visualization and computer graphics,25(7), pp.2505-2512.

GCC Compiler Option 1 : Optimization Options

手册

全体选项其中一部分是Optimize-Options

# 会列出可选项
g++ -march=native -m32 ... -Q --help=target 
# 会列出O3默认开启和关闭选项
g++ -O3 -Q --help=optimizers

编译时最好按照其分类有效组织, 例子如下:

g++ 
# Warning Options
-Wall -Werror -Wno-unknown-pragmas -Wno-dangling-pointer 
# Program Instrumentation Options
-fno-stack-protector
# Code-Gen-Options
-fno-exceptions -funwind-tables -fasynchronous-unwind-tables
# C++ Dialect
-fabi-version=2 -faligned-new -fno-rtti
# define
-DPIN_CRT=1 -DTARGET_IA32E -DHOST_IA32E -fPIC -DTARGET_LINUX 
# include
-I../../../source/include/pin 
-I../../../source/include/pin/gen 
-isystem /staff/shaojiemike/Download/pin-3.28-98749-g6643ecee5-gcc-linux/extras/cxx/include 
-isystem /staff/shaojiemike/Download/pin-3.28-98749-g6643ecee5-gcc-linux/extras/crt/include 
-isystem /staff/shaojiemike/Download/pin-3.28-98749-g6643ecee5-gcc-linux/extras/crt/include/arch-x86_64 
-isystem /staff/shaojiemike/Download/pin-3.28-98749-g6643ecee5-gcc-linux/extras/crt/include/kernel/uapi 
-isystem /staff/shaojiemike/Download/pin-3.28-98749-g6643ecee5-gcc-linux/extras/crt/include/kernel/uapi/asm-x86 
-I../../../extras/components/include 
-I../../../extras/xed-intel64/include/xed 
-I../../../source/tools/Utils 
-I../../../source/tools/InstLib 
# Optimization Options
-O3 -fomit-frame-pointer -fno-strict-aliasing 
-c -o obj-intel64/inscount0.o inscount0.cpp

常见选项

  • -Wxxx 对 xxx 启动warning,
  • -fxxx 启动xxx的编译器功能。-fno-xxx 关闭对应选项???
  • -gxxx debug 相关
  • -mxxx 特定机器架构的选项
名称 含义
-Wall 打开常见的所有warning选项
-Werror 把warning当成error
-std= C or C++ language standard. eg 'c++11' == 'c++0x' 'c++17' == 'c++1z', which 'c++0x','c++17' is develop codename
-Wunknown-pragmas 未知的pragma会报错(-Wno-unknown-pragmas 应该是相反的)
-fomit-frame-pointer 不生成栈帧指针,属于-O1优化
-Wstack-protector 没有防止堆栈崩溃的函数时warning (-fno-stack-protector)
-MMD only user header files, not system header files.
-fexceptions Enable exception handling.
-funwind-tables Unwind tables contain debug frame information which is also necessary for the handling of such exceptions
-fasynchronous-unwind-tables Generate unwind table in DWARF format. so it can be used for stack unwinding from asynchronous events
-fabi-version=n Use version n of the C++ ABI. The default is version 0.(Version 2 is the version of the C++ ABI that first appeared in G++ 3.4, and was the default through G++ 4.9.) ABI: an application binary interface (ABI) is an interface between two binary program modules. Often, one of these modules is a library or operating system facility, and the other is a program that is being run by a user.
-fno-rtti Disable generation of information about every class with virtual functions for use by the C++ run-time type identification features (dynamic_cast and typeid). If you don’t use those parts of the language, you can save some space by using this flag
-faligned-new Enable support for C++17 new of types that require more alignment than void* ::operator new(std::size_t) provides. A numeric argument such as -faligned-new=32 can be used to specify how much alignment (in bytes) is provided by that function, but few users will need to override the default of alignof(std::max_align_t). This flag is enabled by default for -std=c++17.
-Wl, xxx pass xxx option to linker, e.g., -Wl,-R/staff/shaojiemike/github/MultiPIM_icarus0/common/libconfig/lib specify a runtime library search path for dynamic libraries (shared libraries) during the linking process.

General Optimization Options

-O, -O2, -O3

-O3 turns on all optimizations specified by -O2

and also turns on the -finline-functions, -funswitch-loops, -fpredictive-commoning, -fgcse-after-reload, -ftree-loop-vectorize, -ftree-loop-distribute-patterns, -ftree-slp-vectorize, -fvect-cost-model, -ftree-partial-pre and -fipa-cp-clone options

-ffastmath

允许使用浮点计算获得更高的性能,但可能会略微降低精度。

-Ofast

更快但是有保证正确

-flto

(仅限 GNU)链接时优化,当程序链接时检查文件之间的函数调用的步骤。该标志必须用于编译和链接时。使用此标志的编译时间很长,但是根据应用程序,当与 -O* 标志结合使用时,可能会有明显的性能改进。这个标志和任何优化标志都必须传递给链接器,并且应该调用 gcc/g++/gfortran 进行链接而不是直接调用 ld。

-mtune=processor

此标志对特定处理器类型进行额外调整,但它不会生成额外的 SIMD 指令,因此不存在体系结构兼容性问题。调整将涉及对处理器缓存大小、首选指令顺序等的优化。

在 AMD Bulldozer 节点上使用的值为 bdver1,在 AMD Epyc 节点上使用的值为 znver2。是zen ver2的简称。

Optimization Options: 数据预取相关

  1. -fprefetch-loop-arrays
  2. 如果目标机器支持,生成预取内存的指令,以提高访问大数组的循环的性能。这个选项可能产生更好或更差的代码;结果在很大程度上取决于源代码中的循环结构。
  3. -Os禁用

Optimization Options: 访存优化相关

https://zhuanlan.zhihu.com/p/496435946

下面没有特别指明都是O3,默认开启

调整数据的访问顺序

  1. -ftree-loop-distribution
  2. 允许将一个复杂的大循环,拆开成多个循环,各自可以继续并行和向量化
  3. -ftree-loop-distribute-patterns
  4. 类似上面一种?
  5. -floop-interchange
  6. 允许交换多层循环次序来连续访存
  7. -floop-unroll-and-jam
  8. 允许多层循环,将外循环按某种系数展开,并将产生的多个内循环融合。

代码段对齐

(不是计算访问的数据)

  1. -falign-functions=n:m:n2:m2
  2. Enabled at levels -O2, -O3. 类似有一堆

调整代码块的布局

  1. -freorder-blocks
  2. 函数基本块重排来,减少分支

Optimization Options: Unroll Flags

-funroll-loops

Unroll loops whose number of iterations can be determined at compile time or upon entry to the loop. -funroll-loops implies -frerun-cse-after-loop. This option makes code larger, and may or may not make it run faster.

-funroll-all-loops

Unroll all loops, even if their number of iterations is uncertain when the loop is entered. This usually makes programs run more slowly. -funroll-all-loops implies the same options as -funroll-loops,

max-unrolled-insns

The maximum number of instructions that a loop should have if that loop is unrolled, and if the loop is unrolled, it determines how many times the loop code is unrolled. 如果循环被展开,则循环应具有的最大指令数,如果循环被展开,则它确定循环代码被展开的次数。

max-average-unrolled-insns

The maximum number of instructions biased by probabilities of their execution that a loop should have if that loop is unrolled, and if the loop is unrolled, it determines how many times the loop code is unrolled. 如果一个循环被展开,则根据其执行概率偏置的最大指令数,如果该循环被展开,则确定循环代码被展开的次数。

max-unroll-times

The maximum number of unrollings of a single loop. 单个循环的最大展开次数。

Optimization Options: SIMD Instructions

-march=native

会自动检测,但有可能检测不对。

-march="arch"

这将为特定架构生成 SIMD 指令并应用 -mtune 优化。 arch 的有用值与上面的 -mtune 标志相同。

g++ -march=native -m32 ... -Q --help=target

-mtune=                               skylake-avx512 

 Known valid arguments for -march= option:
    i386 i486 i586 pentium lakemont pentium-mmx winchip-c6 winchip2 c3 samuel-2 c3-2 nehemiah c7 esther i686 pentiumpro pentium2 pentium3 pentium3m pentium-m pentium4 pentium4m prescott nocona core2 nehalem corei7 westmere sandybridge corei7-avx ivybridge core-avx-i haswell core-avx2 broadwell skylake skylake-avx512 cannonlake icelake-client icelake-server cascadelake tigerlake bonnell atom silvermont slm goldmont goldmont-plus tremont knl knm intel geode k6 k6-2 k6-3 athlon athlon-tbird athlon-4 athlon-xp athlon-mp x86-64 eden-x2 nano nano-1000 nano-2000 nano-3000 nano-x2 eden-x4 nano-x4 k8 k8-sse3 opteron opteron-sse3 athlon64 athlon64-sse3 athlon-fx amdfam10 barcelona bdver1 bdver2 bdver3 bdver4 znver1 znver2 btver1 btver2 generic native

-msse4.2 -mavx -mavx2 -march=core-avx2

dynamic flags

-fPIC

position-independent code(PIC)

需要进一步的研究学习

暂无

遇到的问题

暂无

开题缘由、总结、反思、吐槽~~

参考文献

https://blog.csdn.net/daidodo/article/details/2185222

https://www.bu.edu/tech/support/research/software-and-programming/programming/compilers/gcc-compiler-flags/

GCC Compiler Option 2 : Preprocessor Options

-Mxxx

  • -M option is designed for auto-generate Makefile rules from g++ command.
  • 默认包含-E option to STOP after preprocessor during the compilation
  • 默认包含-w option to DISABLE/suppress all warnings.

Using a complex g++ command as an example:

g++ -Wall -Werror -Wno-unknown-pragmas -DPIN_CRT=1 -fno-stack-protector -fno-exceptions -funwind-tables -fasynchronous-unwind-tables -fno-rtti -DTARGET_IA32E -DHOST_IA32E -fPIC -DTARGET_LINUX -fabi-version=2 -faligned-new -I../../../source/include/pin -I../../../source/include/pin/gen -isystem /staff/shaojiemike/Download/pin-3.28-98749-g6643ecee5-gcc-linux/extras/cxx/include -isystem /staff/shaojiemike/Download/pin-3.28-98749-g6643ecee5-gcc-linux/extras/crt/include -isystem /staff/shaojiemike/Download/pin-3.28-98749-g6643ecee5-gcc-linux/extras/crt/include/arch-x86_64 -isystem /staff/shaojiemike/Download/pin-3.28-98749-g6643ecee5-gcc-linux/extras/crt/include/kernel/uapi -isystem /staff/shaojiemike/Download/pin-3.28-98749-g6643ecee5-gcc-linux/extras/crt/include/kernel/uapi/asm-x86 -I../../../extras/components/include -I../../../extras/xed-intel64/include/xed -I../../../source/tools/Utils -I../../../source/tools/InstLib -O3 -fomit-frame-pointer -fno-strict-aliasing -Wno-dangling-pointer 
-M inscount0.cpp -o Makefile_bk

In Makefile_bk

inscount0.o: inscount0.cpp \
 # sys header
 /usr/include/stdc-predef.h \
 /staff/shaojiemike/Download/pin-3.28-98749-g6643ecee5-gcc-linux/extras/cxx/include/iostream \
 /usr/lib/gcc/x86_64-linux-gnu/11/include/float.h
 # usr header
 ../../../source/include/pin/pin.H \
 ../../../extras/xed-intel64/include/xed/xed-interface.h \
 ... more header files
  • -MM not include sys header file
  • e.g., the first 3 header will be disapear.
  • -MF filename config the Makefile rules write to which file instead of to stdout.
  • -M -MG is designed to generate Makefile rules when there is header file missing, treated it as generated in normal.
  • -M -MP will generated M-rules for dependency between header files
  • e.g., header1.h includes header2.h. So header1.h: header2.h in Makefile
  • -MD == -M -MF file without default option -E
  • the default file has a suffix of .d, e.g., inscount0.d for -c inscount0.cpp
  • -MMD == -MD not include sys header file

需要进一步的研究学习

暂无

遇到的问题

暂无

开题缘由、总结、反思、吐槽~~

参考文献

上面回答部分来自ChatGPT-3.5,没有进行正确性的交叉校验。

Zsim

简介

Zsim模拟器是

  • 一个快速的x86-64多核模拟器,它利用英特尔Pin工具包收集进程的内存访问跟踪,并在zsim模拟器中重放跟踪。
  • 一种基于 PIN 的二进制插桩工具,可以在运行时对指令进行插桩,并插入自定义的函数调用,用于模拟内存子系统的行为。
  • 它最初是为了评估ZCache而编写的,但后来它扩展了其功能
  • zsim的主要目标是快速,简单和准确,重点是模拟内存层次结构和大型异构系统

Colorful Commands

导言

电脑玩家经常说RGB是最重要的,对于程序员来说,彩色的terminal有助于快速的分辨输出的有效信息。为此有一些有意思的彩色输出命令。

Cheat sheet (命令行小抄/备忘录)

最经典 tdlr

使用时需要网络

npm install -g tldr     
pip3 install tldr     
tealdeer - simplest example

a RUST fast version oftdlr

Tips: OpenSSL development headers get a "failed to run custom build command for openssl-sys" error message. The package is calledlibssl-dev on Ubuntu.

# install
cargo install tealdeer

# 使用
tdlr <>

部分支持中文,支持多平台

自定义
  1. cheat + 编写的cheatsheets
    1. 支持fzf和自动补全
  2. kb. A minimalist knowledge base manager
  3. eg provides examples of common uses of command line tools.
支持在线网页版
  1. Linux Command Line Cheat Sheet
  2. devhints.io
  3. 各种的选项,不止命令,包括bash, vim, mysql, git
  4. 语言 go, python, java, JS, NodeJS, Ruby 3.
  5. navi
  6. 支持语意转换的补全 🔥
  7. cheat.sh 🔥
  8. 支持 curl命令直接访问或者交互式
  9. 支持补全
  10. 返回内容集成cheat cheat.sheets tdlr
  11. bropages.org
  12. 用户自发投票排序的命令用例
navi installation & usage
# install
cargo install --locked navi

# download default cheatsheet
navi repo add denisidoro/cheats 

# 使用
navi
# 基于fzf寻找需要指令

SHELL

oh my zsh

虽然这个ohmyzsh好用,但是我用惯了hyq的模板, 从github上下载后解压就安装了zsh模板。(之后可以考虑传到云盘或者cloudflare)

HOME=/home/xxx
export SHELL=zsh
export PATH=$HOME/.local/bin:$PATH
export HISTFILE=$HOME/.zsh_history
zsh
git clone https://github.com/Kirrito-k423/QuickStartLinux.git
cd QuickStartLinux/resources
tar xvf zsh.tar -C $HOME

zsh_history 支持多端口同步,实时保存

~/.zshrc
HISTFILE=~/.zsh_history
SAVEHIST=10000 # 最多 10000 条命令的历史记录
setopt APPEND_HISTORY #  退出 zsh 会话时,命令不会被覆盖式地写入到历史文件,而是追加到该文件的末尾
setopt INC_APPEND_HISTORY # 会话进行中也会将命令追加到历史文件中
setopt SHARE_HISTORY # 所有会话中输入的命令保存到一个共享的历史列表中
export HIST_SAVE_FREQ=10  # 每10次命令保存一次
cd ~

窗口管理器 tmux-like

oh my tmux 🔥
## Install
cd
git clone https://github.com/gpakosz/.tmux.git
ln -s -f .tmux/.tmux.conf
cp .tmux/.tmux.conf.local .

# or
cd ~/resources
# wget https://gitee.com/shaojiemike/oh-my-tmux/repository/blazearchive/master.zip?Expires=1629202041&Signature=Iiolnv2jN6GZM0hBWY09QZAYYPizWCutAMAkhd%2Bwp%2Fo%3D
unzip  oh-my-tmux-master.zip -d ~/
ln -s -f ~/oh-my-tmux-master/.tmux.conf ~/.tmux.conf
cp ~/oh-my-tmux-master/.tmux.conf.local ~/.tmux.conf.local
基于Rust的zellij

开发编辑器 vim-like

vimrc 🔥
git clone --depth=1 https://github.com/amix/vimrc.git ~/.vim_runtime
sh ~/.vim_runtime/install_awesome_vimrc.sh
emacs

针对不同语言有许多可选插件

### Ubuntu install emacs27

add-apt-repository ppa:kelleyk/emacs
apt-get update
apt-get install emacs27

#### 问题:

dpkg-deb: error: paste subprocess was killed by signal (Broken pipe)
Errors were encountered while processing:
/var/cache/apt/archives/emacs27-common_27.1~1.git86d8d76aa3-kk2+20.04_all.deb
E: Sub-process /usr/bin/dpkg returned an error code (1)

版本解决,强制安装 sudo apt-get -o Dpkg::Options::="--force-overwrite" install emacs27-common

sudo apt --purge remove emacs27
sudo apt --purge remove emacs
sudo apt --purge remove emacs-common
sudo apt --fix-broken install
sudo apt autoremove
sudo apt install emacs27
emacs --version
doom

### install doom

git clone --depth 1 https://github.com/doomemacs/doomemacs ~/.emacs.d
~/.emacs.d/bin/doom install

中文教程 https://www.bilibili.com/read/cv11371146

常用命令的"Colorful"版本

cd

z.lua - learning cd 🔥

Install LUA

```sh curl -R -O http://www.lua.org/ftp/lua-5.4.4.tar.gz tar zxf lua-5.4.4.tar.gz cd lua-5.4.4 make all test sudo make install # usr/bin

Install

  ```sh
  cd ~/github
  git clone https://github.com/skywind3000/z.lua.git

  # vim ~/.zshrc
  alias zz='z -c' # 严格匹配当前路径的子路径
  alias zi='z -i' # 使用交互式选择模式
  alias zf='z -I' # 使用 fzf 对多个结果进行选择
  alias zb='z -b' # 快速回到父目录
  #eval "$(lua /path/to/z.lua  --init zsh)"    # ZSH 初始化
  eval "$(lua ~/github/z.lua/z.lua  --init zsh)"
  ```

常用命令

  ```sh
  # 弹出栈顶 (cd 到上一次的老路径),和 "z -0" 相同
  $ z -

  # 显示当前的 dir stack
  $ z --

  # 交互式
  z -i foo    # 进入交互式选择模式,让你自己挑选去哪里(多个结果的话)
  z -I foo    # 进入交互式选择模式,但是使用 fzf 来选择

  # 匹配
  z foo$
  ```

```sh       
z foo       # 跳转到包含 foo 并且权重(Frecent)最高的路径       
z foo bar   # 跳转到同时包含 foo 和 bar 并且权重最高的路径       
z -r foo    # 跳转到包含 foo 并且访问次数最高的路径       
z -t foo    # 跳转到包含 foo 并且最近访问过的路径       
z -l foo    # 不跳转,只是列出所有匹配 foo 的路径       
z -c foo    # 跳转到包含 foo 并且是当前路径的子路径的权重最高的路径       
z -e foo    # 不跳转,只是打印出匹配 foo 并且权重最高的路径       
z -i foo    # 进入交互式选择模式,让你自己挑选去哪里(多个结果的话)       
z -I foo    # 进入交互式选择模式,但是使用 fzf 来选择       
z -b foo    # 跳转到父目录中名称以 foo 开头的那一级       

缺点:

  • 没去过的路径,每级文件夹的补全没有了
  • 可以和cd结合使用

ls

exa 🔥 - better ls
# Manual installation from GitHub. Ubuntu 20.10才支持
wget https://github.com/ogham/exa/releases/download/v0.10.1/exa-linux-x86_64-musl-v0.10.1.zip
unzip exa-linux-x86_64-musl-v0.10.1.zip
mv bin/exa ~/.local/bin

# 使用
exa -l
# 文件夹大小
du -d 1 -h .

grep

rg (Fast & Good multi-platform compatibility) > ag > ack(ack-grep) 🔥

repgrep(rg) Rust编写
# ripgrep(rg) 但是readme说这样有bugs       
sudo apt-get install ripgrep       
# 可执行文件 (推荐)    
wget https://github.com/BurntSushi/ripgrep/releases/download/13.0.0/ripgrep-13.0.0-x86_64-unknown-linux-musl.tar.gz      
tar -zxvf ripgrep-13.0.0-x86_64-unknown-linux-musl.tar.gz       
mv ./ripgrep-13.0.0-x86_64-unknown-linux-musl/rg ~/.local/bin       

repgrep(rg) 常用选项

  • --no-ignore 忽略.gitignore之类的文件,也搜索忽略的文件。(默认是不搜索的)
  • -t txt 指定搜索类型
  • rg 'content' ABC/*.cpp搜索和正则ABC/*.cpp匹配的文件
ag
# ag 2020年就不维护了       
apt-get install silversearcher-ag       
# It ignores file patterns from your .gitignore and .hgignore.       
# use -u or -U option to reinclude these files to search scoop       

find

fzf 🔥带预览的find
# ubuntu
sudo apt install fzf

# GIT install
git clone --depth 1 https://github.com/junegunn/fzf.git ~/.fzf
~/.fzf/install
source ~/.zshrc
# Vim-plugin
Plug 'junegunn/fzf', { 'do': { -> fzf#install() } }

# 使用
fzf --preview 'less {}'

# 安装了bat
fzf --preview "batcat --style=numbers --color=always --line-range :500 {}"
telescope.nvim 也带预览的find

官网

# 先安装vim-plug
curl -fLo~/.vim/autoload/plug.vim --create-dirs \ https://raw.githubusercontent.com/junegunn/vim-plug/master/plug.vim
# 修改~/.vimrc
call plug#begin()
Plug 'nvim-lua/plenary.nvim'
Plug 'nvim-telescope/telescope.nvim'
call plug#end()

# 还需要 Neovim
to do
fdfind(fd)

A simple, fast and user-friendly alternative to 'find'

cat

bat 🔥 - colorful cat
# Install
sudo apt install bat

# 使用
batcat filename
# 指定行号
alias cat="batcat"
cat -r 35:42 /etc/hosts

git

gitui 🔥 - fast Rust lazygit

https://github.com/extrawurst/gitui/releases

# 建议Rust,三句命令,安装Rust,source,gitui
curl https://sh.rustup.rs -sSf | sh
source $HOME/.cargo/env
cargo install gitui

# 安装(由于还在开发中建议去官网 , 现在不支持armV7
wget https://github.com/extrawurst/gitui/releases/download/v0.20.1/gitui-linux-musl.tar.gz
tar -zxvf gitui-linux-musl.tar.gz
mv gitui ~/.local/bin
lazygit
# install go
wget https://go.dev/dl/go1.18.1.linux-amd64.tar.gz

git clone https://github.com/jesseduffield/lazygit.git
cd lazygit
go install

高亮终端输出/log文件

bash脚本输出颜色文本示例

RED='\033[0;31m'       
NC='\033[0m' 
# No Color       
printf "I ${RED}love${NC} Stack Overflow\n"       
echo -e "\033[5;36m Orz 旧容器(镜像)已清理\033[0m"       

颜色编号如下

颜色 编号
Black 0;30
Dark Gray 1;30
Red 0;31
Light Red 1;31
Green 0;32
Light Green 1;32
Brown/Orange 0;33
Yellow 1;33
Blue 0;34
Light Blue 1;34
Purple 0;35
Light Purple 1;35
Cyan 0;36
Blue 0;37
Light Cyan 1;36
Light Gray 0;37
White 1;37
hl 🔥自定义高亮各种log文件

通过regular expressions自定义高亮各种log文件

install需要 lex

git clone https://github.com/mbornet-hl/hl       
make clean; 
make      
cp hl /usr/local/bin 
# move       

颜色支持(3浅中深 * 6颜色 * 背景色反转)

# 前面 123 是深浅 , 4是下划线       
# 字母大写是背景色反转       
-r : red        -g : green        -y : yellow        -b : blue        -m : magenta        -c : cyan        -w : white        

正则标记log关键词

绿色和红色

cat exemple.log | hl -g start -r stop       

正则表示

-e : extended regular expressions
-i : ignore case

hl -ei -g '(start(|ing|ed))' -r '(stop(|ping|ped))'

## ip 匹配
curl --trace-ascii - www.baidu.com|hl -ei -1R '[0-9]{1,3}\.[0-9]{1,3}\.[0-9]{1,3}\.[0-9]{1,3}'

命令配置文件 hl_ha.cfg

默认设置

export HL_CONF=/staff/shaojiemike/github/hl/config_files       
echo $HL_CONF       │/staff/shaojiemike/github/hl/config_files       
-%c : specifies the beginning of a range colorized in color 'c'       
-.  : specifies the end of the previous range       

Colorize hl configurations :

hl -vop '*' | hl --hl_conf       

example Commands

lD # ls by date       
lW # ls by week       
ifconfig -a | hl --ifconfig       
# ping tcpdump fdisk apt-get diff       
# ip ibstat iptables passwd       

errors

常用方式

~/.zshrc 里如下配置:

export HL_CONF=/home/shaojiemike/github/hl/config_files       
function my_hl(){          hl -eg '\$\{?[A-Z_]+\}?' -ec ' ([A-Z_-]+) ' -eic '(nothing|note)' -eiy ' (-([a-z_-]+))' -eiy '0x[0-9a-z]+' --errors -eig '(yes)' -eir '((^| )no($| ))|(none)|(not)|(null)|(please)|( id )' -ir error -ir wrong -ib '(line)|(file)' -eiy '(warn(|ing))|(wait)|(idle)|(skip)' -im return -ic '(checking)' -eiy ' (__(.*)__) ' -ei1W '((\w*/[.A-Za-z0-9_/-]*[A-Za-z0-9_/-]*)("|$)?)|((\w*/[.A-Za-z0-9_/-]*[A-Za-z0-9_/-]*)(")? ) ' -3B '[0-9][0-9.]+' -3B ' ([0-9])|(#[0-9]+)' -eig '(start(|ing))' -eir '(end(|ing))'       }       
alias ifconfig='ifconfig | hl --ifconfig'       
alias ip='ip a|hl --ip '       
alias df='df -h |hl --df'       
alias ibstat='ibstat |hl --ibstat'       

编译时如此使用make 2>&1|my_hl

系统信息

dua-cli - best disk space viewer 🔥

more

资源监控

资源监控软件netdata
  • netdata 默认挂载在http://127.0.0.1:19999/。想要WebUI运行 sudo netdata -i node5.acsalab.com
  • cpu, disk, memory, network,温度都有记录
  • arm下有问题,需要自己编译

资源监控命令bottom(htop like)
# install
curl -LO https://github.com/ClementTsang/bottom/releases/download/0.6.8/bottom_0.6.8_amd64.deb
sudo dpkg -i bottom_0.6.8_amd64.deb

# 使用
btm

类似s-tui可以观察CPU 温度,频率

网络监控 bmon

bmon是类 Unix 系统中一个基于文本,简单但非常强大的网络监视和调试工具

Compile yourself

Install libconfuse

sh wget https://github.com/martinh/libconfuse/releases/download/v2.8/confuse-2.8.zip unzip confuse-2.8.zip && cd confuse-2.8 PATH=/usr/local/opt/gettext/bin:$PATH ./configure make make install Install bmon

sh git clone https://github.com/tgraf/bmon.git cd bmon ./autogen.sh ./configure make make install bmon

文件管理器

nnn 多平台

https://github.com/jarun/nnn#quickstart

很复杂,插件和快捷键超级多

sh # 版本很低 3.0 sudo apt-get install nnn # Q 退出

ranger 基于vi的支持预览的横向多级显示 🔥

https://github.com/ranger/ranger

pip install ranger-fm

# renger直接使用,方向键或者hjkl,可以直接跳转到vim修改
xplr - 筛选排序tips板 - 支持多选,正则查找, mov改名delete 🔥

https://github.com/sayanarijit/xplr

sh cargo install --locked --force xplr

参考文献

LinuxFolderInstall

system folders structure

根据教程

  1. /etc:是 Etcetera(等等) 的缩写,这个目录用来存放所有的系统管理所需要的配置文件和子目录。
  2. 这个是系统中的配置文件,如果你更改了该目录下的某个文件可能会导致系统不能启动。各种服务(ssh,apache2,nfs)的配置文件
  3. /lib:是 Library(库) 的缩写这个目录里存放着系统最基本的动态连接共享库,其作用类似于 Windows 里的 DLL 文件。几乎所有的应用程序都需要用到这些共享库。
  4. /opt:是 optional(可选) 的缩写,这是给主机额外安装软件所摆放的目录。比如你安装一个ORACLE数据库则就可以放到这个目录下。默认是空的。
  5. /usr:是 unix shared resources(共享资源) 的缩写,这是一个非常重要的目录,用户的很多应用程序和文件都放在这个目录下,类似于 windows 下的 program files 目录。It's install for all user.
  6. /var:是 variable(变量) 的缩写,这个目录中存放着在不断扩充着的东西,我们习惯将那些经常被修改的目录放在这个目录下。包括各种日志文件

sudo install path

TODO: during the application install, which locations those app used?

I guess it's usr/bin or /include , opt and /lib

  1. GNU G++
  2. cuda
  3. intel one-api

需要进一步的研究学习

暂无

遇到的问题

暂无

开题缘由、总结、反思、吐槽~~

参考文献

上面回答部分来自ChatGPT-3.5,没有进行正确性的交叉校验。

AntiCheat

AntiCheat

运行卡拉比丘时,报错 Anti-Cheat Expert (ACE)

ACE安全中心
安全组件运行异常。请关闭并卸载可能影响游戏按全的软
件,用杀毒软件进行杀毒清理,重启后用管理员模式启动
游戏重试。
(13-131084-433)
  1. 安全码也没有找到合适的文档
  2. 只能按照官方的老教程check一下
  3. 手动启动 Anti-Cheat Expert 服务就行
  4. 有时候需要重启

需要进一步的研究学习

暂无

遇到的问题

暂无

开题缘由、总结、反思、吐槽~~

参考文献

上面回答部分来自ChatGPT-3.5,没有进行正确性的交叉校验。

Vscode

Remote-SSH Bugs

难以解决就重装VSCODE: 奇怪的问题多是插件兼容性导致

原理

文件名da76f93349a72022ca4670c1b84860304616aaa2实际上是一个特定VS Code Server版本的唯一标识符(通常称为“提交ID”或“版本哈希”)。VS Code Server的每个版本都有一个不同的提交ID,这个ID对应于VS Code源代码仓库中的一个特定提交。

VS Code如何选择使用哪个版本
  1. 版本匹配:当VS Code尝试建立与远程环境的连接时,它会检查远程环境中安装的VS Code Server版本。VS Code客户端会根据自己的版本请求匹配的VS Code Server版本,确保二者之间的兼容性。
  2. 自动下载和安装:如果远程环境中没有找到匹配的VS Code Server版本,VS Code客户端会自动下载并安装所需的VS Code Server版本。这个过程是自动的,确保用户无需手动介入版本匹配和安装过程。
  3. 多版本共存:在远程环境中,可以存在多个不同版本的VS Code Server。这允许不同版本的VS Code客户端与远程环境连接,每个客户端使用与之兼容的VS Code Server版本。这种设计使得在同一远程环境中支持多用户或多版本使用成为可能。
  4. 版本选择:当VS Code客户端连接到远程环境时,它会基于客户端的版本信息选择合适的VS Code Server版本。如果远程环境中已经安装了多个版本的VS Code Server,VS Code会自动选择与客户端版本对应的服务器版本。

Could not establish connection. XHR failed

原因是没有网络,需要自己手动下载包

先查看包对应版本

# shaojiemike @ node5 in ~ [15:24:54] C:1
$ rm ~/.vscode-server -rf

# shaojiemike @ node5 in ~ [15:24:59]
$ ls ~/.vscode-server/bin/
784b0177c56c607789f9638da7b6bf3230d47a8c

下载对应版本,移动解压

set_proxy
# 或者 自己电脑下,然后传上去,30MB左右
wget https://update.code.visualstudio.com/commit:784b0177c56c607789f9638da7b6bf3230d47a8c/server-linux-x64/stable
mv stable ~/.vscode-server/bin/784b0177c56c607789f9638da7b6bf3230d47a8c/vscode-server-linux-x64.tar.gz
cd ~/.vscode-server/bin/784b0177c56c607789f9638da7b6bf3230d47a8c
tar -xvxf vscode-server-linux-x64.tar.gz --strip-components 1

重新连接即可

Server installation process already in progress

Server installation process already in progress - waiting and retrying
Acquiring lock on /staff/shaojiemike/.vscode-server/bin/6c3e3dba23e8fadc360aed75ce363ba185c49794/vscode-remote-lock.shaojiemike.6c3e3dba23e8fadc360aed75ce363ba185c49794
[09:25:29.643] > Installation already in progress...

just remove the locked file

过程试图写入的管道不存在

Install terminal quit with output: 过程试图写入的管道不存在。
[08:39:15.476] Received install output: 过程试图写入的管道不存在。

一般是本地的known_hosts冲突了,

  1. 删除对应项或者文件后。
  2. terminal重新连接,添加known_hosts
  3. VS Code 正常

lock on

[15:18:37.132] > Acquiring lock on /staff/shaojiemike/.vscode-server/bin/da76f93349a72022ca4670c1b84860304616aaa2/vscode-remote-lock.shaojiemike.da76f93349a72022ca4670c1b84860304616aaa2
[15:18:37.144] > \ln /staff/shaojiemike/.vscode-server/bin/da76f93349a72022ca4670c1b84860304616aaa2/vscode-remote-lock.shaojiemike.da76f93349a72022ca4670c1b84860304616aaa2.target /staff/shaojiemike/.vscode-server/bin/da76f93349a72022ca467
> 0c1b84860304616aaa2/vscode-remote-lock.shaojiemike.da76f93349a72022ca4670c1b84860304616aaa2
[15:18:37.163] > Found existing installation at /staff/shaojiemike/.vscode-server/bin/da76f93349a72022ca4670c1b84860304616aaa2...
> Checking /staff/shaojiemike/.vscode-server/.da76f93349a72022ca4670c1b84860304616aaa2.log and /staff/shaojiemike/.vscode-server/.da76f93349a72022ca4670c1b84860304616aaa2.pid for a running server
> Looking for server with pid: 1679721
[15:18:37.208] > Found running server...

this is because connect the same user in shared disk system (e.g., NFS) at the same time from snode6 and icarus0 two different machine.

So just open all fold from the same machine using VSCODE. Or kill -9 pid twice will jump to the before question.

服务器插件下载

设置代理,解决绝大部分问题

ssh 公钥的位置

cd
cat .ssh/id_rsa.pub

VSCODE C++ 自动跳转

  1. 已经安装了 C/C++和 C++ Intellisense 插件;
  2. 确认 C_Cpp: IntelliSenseEngine 的开关打开
  3. 左击插件 C/C++,选择小齿轮 -> 扩展设置。
  4. 搜索框内输入 “intell”,将 C_Cpp:Intelli Sense Engine 开关设置为 Default。
  5. “Ctrl + Shift + P”打开C/C++:Edit Configurations(JSON)创建。

另一个基于ctag+vscode的实现方法

  1. 安装插件

VScode Debug Run

数组查看技巧

参考GDB的命令

多线程进程调试c++

注意编译选项-g -O0。不然常量参数flag=1会被优化掉。

修改代码

void LaunchProcess(uint32_t procIdx) {
    int cpid = fork();
    int tsj_flag = 1;
    while(tsj_flag){
        sleep(0.5);
    }

找到运行子进程的PID

PID USER      PRI  NI  VIRT   RES   SHR S CPU% MEM%   TIME+  Command                                                                                                                                                                                                                                              
243149 shaojiemi  20   0 1026M  2132  2036 S  8.4  0.0  0:07.00     └─ ./build/opt/zsim tests/pim.cfg
243150 shaojiemi  20   0 1026M   136    40 S  9.0  0.0  0:07.04        └─ ./build/opt/zsim tests/pim.cfg

VSCODE设置,连接上后需要暂停再启动一次

{
    "name": "(gdb) 附加",
    "type": "cppdbg",
    "request": "attach",
    "program": "/home/staff/shaojiemike/github/ramulator-pim/zsim-ramulator/build/debug/zsim",
    "processId":"276570",
    "MIMode": "gdb",
    "setupCommands": [
        {
            "description": "为 gdb 启用整齐打印",
            "text": "-enable-pretty-printing",
            "ignoreFailures": true
        },
        {
            "description":  "将反汇编风格设置为 Intel",
            "text": "-gdb-set disassembly-flavor intel",
            "ignoreFailures": true
        }
    ]
},

多线程进程调试python

图中白色是主进程,绿色是所属同名子进程,来负责不同的功能。

对于通过subprocess.Popen(cmd).communicate()已经创建的子进程(代码中编写time.sleep(20),并在下一条指令标记断点),需要设置launch.json,在同一个VSCODE窗口下启动一个新的debug示例,然后选择其PID来监控

{
   "name": "Python: 使用 PID 连接",
   "type": "python",
   "request": "attach",
   "processId": "${command:pickProcess}"
  },

对于threading.Thread(target = fuc, args = (xxx)).start()启动的线程不需要额外监视。

最终能有如下效果:

单线程启动

{
  "name": "C++ Launch",
  "type": "cppdbg",
  "request": "launch",
  "program": "${workspaceFolder}/a.out",
  "args": ["arg1", "arg2"],
  "environment": [{ "name": "config", "value": "Debug" }],
  "cwd": "${workspaceFolder}"
}
{
    "configurations": [
  {
   "name": "(gdb) 启动",
   "type": "cppdbg",
   "request": "launch",
   "program": "/home/staff/shaojiemike/github/ramulator-pim/zsim-ramulator/build/opt/zsim",
            //args设置注意双引号内没有空格,也就是原本命令中的空格就是分隔符。还需要注意路径
   "args": ["/home/staff/shaojiemike/github/ramulator-pim/zsim-ramulator/tests/pim.cfg"],
            "args": ["--config", "${workspaceFolder}/Configs/host.cfg",
                "--disable-perf-scheduling","true","--mode=cpu",
                "--stats","host.stats","--trace","${workspaceFolder}/sample_traces/host/rodiniaBFS.out",
                "--core-org=outOrder","--number-cores=4","--trace-format=zsim","--split-trace=true"],
   "stopAtEntry": false,
   "cwd": "/home/staff/shaojiemike/github/ramulator-pim/zsim-ramulator",
   "environment": [{ "name":"LD_LIBRARY_PATH","value":"/home/staff/shaojiemike/github/ramulator-pim/zsim-ramulator/pin/intel64/runtime/pincrt:/home/staff/shaojiemike/github/ramulator-pim/zsim-ramulator/pin/extras/xed-intel64/lib" } ],
   "externalConsole": false,
   "MIMode": "gdb",
   "setupCommands": [
    {
     "description": "为 gdb 启用整齐打印",
     "text": "-enable-pretty-printing",
     "ignoreFailures": true
    },
    {
     "description":  "将反汇编风格设置为 Intel",
     "text": "-gdb-set disassembly-flavor intel",
     "ignoreFailures": true
    }
   ]
  }

 ]
}
g++ -g -std=c++11 SLIC.cpp -o SLIC #把调试信息加到可执行文件中,如果没有-g,你将看不见程序的函数名、变量名,所代替的全是运行时的内存地址。

参数

{
    // 使用 IntelliSense 了解相关属性。 
    // 悬停以查看现有属性的描述。
    // 欲了解更多信息,请访问: https://go.microsoft.com/fwlink/?linkid=830387
    "version": "0.2.0",
    "configurations": [
        {
            "name": "Python: 当前文件",
            "type": "python",
            "request": "launch",
            "program": "${file}",
            "args": ["txt" "E:\\PowerShell\\github\\classin-downloader\\bb.html"],
            "console": "integratedTerminal",
            "justMyCode": true
        }
    ]
}

"args": [],里添加

自动格式化

"C_Cpp.clang_format_fallbackStyle": "{ BasedOnStyle: Google, ColumnLimit: 0, AllowShortIfStatementsOnASingleLine: false, AllowShortLoopsOnASingleLine: false, IndentWidth: 4, PointerAlignment: Right, SpacesBeforeTrailingComments: 1 }"

需要进一步的研究学习

暂无

遇到的问题

暂无

开题缘由、总结、反思、吐槽~~

参考文献

VIM

cheat sheet

More advanced details

basic mode

  • : to change mode?
  • / to search
  • ? to up search
  • * to search cursor current word

replace

:{作用范围}s/{目标字符}/{替换的字符}/{替换标志}
  • 作用范围:用于指定替换的范围,
    • 1,3表示替换第一行至第三行,
    • 1,$表示替换第一行到最后一行,也可以直接用%表示。
  • 替换标志(可以组合使用):
    • c: confirm,每次替换前都会询问
    • e:不显示error
    • g: globe,不询问,整个替换
    • i: ignore,即不区分大小写

分屏

  1. 创建空白分屏 :new
  2. 打开当前文件 ???
  3. 命令(水平): [CTRL] [W] s
  4. 命令(垂直): [CTRL] [W] v
  5. 打开任意文件
  6. 命令(水平): :split [FILENAME] #或 :sp [FILENAME]
  7. 命令(垂直): :vsplit [FILENAME] #或 :vs [FILENAME]
  8. 关闭
  9. 取消其它分屏,只保留当前分屏 :only
  10. 或者 [CTRL] W o
  11. 退出当前所在分屏 :q #或者: :quit

usefully tricks

comment block text

teminal read code

ctags + 函数跳转

  1. 安装ctags sudo apt-get install exuberant-ctags
  2. 生成函数名索引文件 ctags -R . /path/another/include will generate tags file

添加

echo "set tags=$PWD/tags" >> ~/.vimrc
# or
vim ~/.vimrc
# set tags=~/Download/llvm-project-main/llvm/tags

vim 使用

Ctrl + ] # forword
Ctrl + t # 返回

Further: other ides

huawei programming : dev machine 使用tmux和zsh可以实现统一的开发环境

参考文献

Github Access

导言

作为程序员,最经常遇到的问题就是无法访问github,这无异于和世界断开连接。

  1. 不太可能是DNS污染的问题
  2. github加速访问两种思路:
    1. VPN加速
    2. warp或者wg转发到墙外(linux 服务器)
  3. 之前能访问,但是现在不能访问,可能是wg配置重启掉了。

DNS on Windows(useless)

  • 查看域名 github.com的DNS(chinaz or ipaddress)。
  • 国内一般默认dns是20.205.243.166 [新加坡 微软云]

修改 windows 目录C:\Windows\System32\drivers\etc\下的hosts文件

140.82.113.3 github.com # 美国的  

wireguard

post request forward is an all-in-one solution.

interface: warp
  public key: fcDZCrGbcpz3sKFqhBw7PtdInygUOtEJfPAs08Wwplc=
  private key: (hidden)
  listening port: 51825

peer: bmXOC+F1FxEMF9dyiK2H5/1SUtzH0JuVo51h2wPfgyo=
  endpoint: [2606:4700:d0::a29f:c001]:1701
  allowed ips: 172.16.0.0/24, 0.0.0.0/0, ::/0
  latest handshake: 89 days, 23 hours, 15 minutes, 28 seconds ago
  transfer: 3.51 GiB received, 1.71 GiB sent
  persistent keepalive: every 25 seconds

latest handshake: 89 days ago demonstrate wg is done for a long time. At the same time mtr github.com shows no output prove the bad situation.

STEP1: first try is to bring the wg-proxy up again

python register.py #自动生成warp-op.conf,warp.conf和warp-helper
mv warp-helper /etc/default
vim /etc/config/network #填写warp-op.conf内容,修改只用替换option private_key 和 ipv6 的 list addresses 即可
ifup warp #启动warp, 代替wg-quick up warp.conf

and test brainiac machine is back online

Proxy in terminal

无法使用ping检查网络,wwww.github.com不会响应ping报文

ssh config

linux下通过按照如下修改.ssh/config设置账号密码,并 ssh -vT [email protected],成功后输出Hi Kirrito-k423! You've successfully authenticated, but GitHub does not provide shell access.

# .ssh/config
Host github.com
  User 943648187@qq.com
  Hostname ssh.github.com
  PreferredAuthentications publickey
  ProxyCommand nc -X 5 -x 127.0.0.1:7890 %h %p #如果通过代理需要这句话
  IdentityFile ~/.ssh/id_rsa
  Port 443

Host *
  ControlMaster auto
  ControlPath /tmp/sshcontrol-%C
  ControlPersist 1d
  ServerAliveInterval 30
Windows PowerShell 平台

假如是windows下,如果安装了git bash,会有connect.exe的程序

配置如下1

Host github.com
  User git
  Port 22
  Hostname github.com
  # 注意修改路径为你的路径
  IdentityFile "C:\Users\Administrator\.ssh\id_rsa"
  TCPKeepAlive yes
  # 这里的 -a none 是 NO-AUTH 模式,参见 https://bitbucket.org/gotoh/connect/wiki/Home 中的 More detail 一节
  ProxyCommand E:\\commonSoftware\\Git\\mingw64\\bin\\connect.exe -S 127.0.0.1:7890 -a none %h %p

Host ssh.github.com
  User git
  Port 443
  Hostname ssh.github.com
  # 注意修改路径为你的路径
  IdentityFile "C:\Users\Administrator\.ssh\id_rsa"
  TCPKeepAlive yes

debug ssh clone/push

ssh-git 与 https-git的不同

git config --global http.proxy localhost:7890 # PowerShell proxy
git config --global http.proxy "http://127.0.0.1:7890"
git config --global https.proxy "http://127.0.0.1:7890"
GIT_CURL_VERBOSE=1 GIT_TRACE=1 git clone [email protected]:Kirrito-k423/autoUpdateIpconfigPushGithub.git

GIT_CURL_VERBOSE=1 GIT_TRACE=1 git clone https://github.com/llvm/llvm-project.git

Windows PowerShell 平台 git push --verbose

不同于linux平台的GIT_TRACE=1 git push,Windows PowerShell 平台应该如下设置:

$env:GIT_CURL_VERBOSE = 1
$env:GIT_TRACE = 1
git push
ssh成功,但是git操作还是失败

没使用上指定config文件,git操作需要明确指定。

$env:GIT_SSH_COMMAND = 'ssh -F /path/to/your/ssh_config'
git push

http代理

There are tons of identical solutions over the internet for defining proxy tunnel for git's downloads like this one, which all is by setting git's https.proxy & http.proxy config. but those answers are not working when you try to clone/push/pull etc. over the ssh protocol!

For example, by setting git config --global https.proxy socks5://127.0.0.1:9999 when you try to clone git clone [email protected]:user/repo.git it does not go through the defined sock5 tunnel!

环境实在是只有https代理, 可以利用github_token的https协议

# Method 1. git http + proxy http
git config --global http.proxy "http://127.0.0.1:1080"
git config --global https.proxy "http://127.0.0.1:1080"

# Method 2. git http + proxy shocks
git config --global http.proxy "socks5://127.0.0.1:1080"
git config --global https.proxy "socks5://127.0.0.1:1080"

# to unset
git config --global --unset http.proxy
git config --global --unset https.proxy

# Method 3. git ssh + proxy http
vim ~/.ssh/config
Host github.com
HostName github.com
User git
ProxyCommand socat - PROXY:127.0.0.1:%h:%p,proxyport=1087

# Method 4. git ssh + proxy socks
vim ~/.ssh/config
Host github.com
HostName github.com
User git
ProxyCommand nc -v -x 127.0.0.1:1080 %h %p

%h %phostpost的意思

或者

After some visiting so many pages, I finally find the solution to my question:

# [step 1] create a ssh-proxy
  ssh -D 9999 -qCN [email protected]

# [step 2] make git connect through the ssh-proxy
  # [current script only]
  export GIT_SSH_COMMAND='ssh -o ProxyCommand="connect -S 127.0.0.1:9999 %h %p"'
  # OR [git global setting] 
  git config --global core.sshCommand 'ssh -o ProxyCommand="connect -S 127.0.0.1:9999 %h %p"'
  # OR [one-time only use]
  git clone -c=core.sshCommand 'ssh -o ProxyCommand="connect -S 127.0.0.1:9999 %h %p"' [email protected]:user/repo.git
  # OR [current repository use only]
  git config core.sshCommand 'ssh -o ProxyCommand="connect -S 127.0.0.1:9999 %h %p"'

To install connect on Ubuntu:

sudo apt install connect-proxy

ssh代理

ssh -vT -o "ProxyCommand connect -S 127.0.0.1:7890 %h %p" [email protected]
ssh -vT -o "ProxyCommand nc -X 5 -x 127.0.0.1:7890 %h %p" [email protected]
# 使用HTTP 代理
ssh -o ProxyCommand='corkscrew proxy.net 8888 %h %p' [email protected]
ssh -o ProxyCommand='proxytunnel -p proxy.net:8888 -P username -d %h:%p' [email protected]

使用时常见问题

大文件提交

Sometimes,it‘s the big log fault.

# find file
find . -type f -name "zsim.log.0" -size +10M
# find the most repeated lines
head -n 10000 your_file.txt | sort | uniq -c | sort -nr | head
# delete partten line in files
sed -i '/\[S 0\] WARN: \[6\] ContextChange, reason SIGRETURN, inSyscall 1/d' /staff/shaojiemike/github/PIA_huawei/log/zsim/chai-n/hsti/1000/cpu_tlb/zsim.log.0

# conbine two command
find . -type f -name "zsim.log.0" -size +10M -print0 | xargs -0 sed -i '/字符串模式/d'
# or just save the tail (sth wrong needed test)
find . -type f -name "zsim.log.0" -size +1M -exec bash -c 'tail -n 2000 "$1" > "$1"_back ' _ {} \;

debug1: expecting SSH2_MSG_KEX_ECDH_REPLY

设置mtu解决:

STEP1:

eno0: flags=4163<UP,BROADCAST,RUNNING,MULTICAST>  mtu 1500
        inet 202.38.73.217  netmask 255.255.255.0  broadcast 202.38.73.255
        inet6 fe80::ae1f:6bff:fe8a:e4ba  prefixlen 64  scopeid 0x20<link>
        inet6 2001:da8:d800:811:ae1f:6bff:fe8a:e4ba  prefixlen 64  scopeid 0x0<global>
        inet6 2001:da8:d800:730:ae1f:6bff:fe8a:e4ba  prefixlen 64  scopeid 0x0<global>
        ether ac:1f:6b:8a:e4:ba  txqueuelen 1000  (以太网)
        RX packets 12345942  bytes 2946978044 (2.9 GB)
        RX errors 0  dropped 1438318  overruns 0  frame 0
        TX packets 4582067  bytes 675384424 (675.3 MB)
        TX errors 0  dropped 0 overruns 0  carrier 0  collisions 0

STEP2:

ifconfig eno0 mtu 1200

STEP3:

[root@localhost ~]# vi /etc/sysconfig/network-scripts/ifcfg-eno0
MTU=1200            #MTU设置

[root@localhost ~]# systemctl restart network

参考文献