sudo tcpdump -i ibs5 '((tcp) and (host 20.205.243.166))'
tcpdump: verbose output suppressed, use -v or -vv for full protocol decode
listening on ibs5, link-type LINUX_SLL (Linux cooked v1), capture size 262144 bytes
15:53:53.848619 IP snode0.59878 > 20.205.243.166.http: Flags [S], seq 879685062, win 64128, options [mss 2004,sackOK,TS val 4096492456 ecr 0,nop,wscale 7], length 0
15:53:53.952705 IP 20.205.243.166.http > snode0.59878: Flags [S.], seq 1917452372, ack 879685063, win 65535, options [mss 1436,sackOK,TS val 1127310087 ecr 4096492456,nop,wscale 10], length 0
15:53:53.952728 IP snode0.59878 > 20.205.243.166.http: Flags [.], ack 1, win 501, options [nop,nop,TS val 4096492560 ecr 1127310087], length 0
15:53:53.953208 IP snode0.59878 > 20.205.243.166.http: Flags [P.], seq 1:79, ack 1, win 501, options [nop,nop,TS val 4096492561 ecr 1127310087], length 78: HTTP: GET / HTTP/1.1
15:53:54.058654 IP 20.205.243.166.http > snode0.59878: Flags [P.], seq 1:89, ack 79, win 64, options [nop,nop,TS val 1127310193 ecr 4096492561], length 88: HTTP: HTTP/1.1 301 Moved Permanently
15:53:54.058668 IP snode0.59878 > 20.205.243.166.http: Flags [.], ack 89, win 501, options [nop,nop,TS val 4096492666 ecr 1127310193], length 0
15:53:54.059092 IP snode0.59878 > 20.205.243.166.http: Flags [F.], seq 79, ack 89, win 501, options [nop,nop,TS val 4096492667 ecr 1127310193], length 0
15:53:54.162608 IP 20.205.243.166.http > snode0.59878: Flags [F.], seq 89, ack 80, win 64, options [nop,nop,TS val 1127310297 ecr 4096492667], length 0
$ sudo tcpdump -i ibs5 -nn -vvv -e '((port 80) and (tcp) and (host 20.205.243.166))'                                                                                                                                                 tcpdump: listening on ibs5, link-type LINUX_SLL (Linux cooked v1), capture size 262144 bytes
16:09:38.743478 Out ethertype IPv4 (0x0800), length 76: (tos 0x0, ttl 64, id 15215, offset 0, flags [DF], proto TCP (6), length 60)
    10.1.13.50.38376 > 20.205.243.166.80: Flags [S], cksum 0x1fd5 (incorrect -> 0x98b6), seq 1489092902, win 64128, options [mss 2004,sackOK,TS val 4097437351 ecr 0,nop,wscale 7], length 0
16:09:38.848164  In ethertype IPv4 (0x0800), length 76: (tos 0x0, ttl 48, id 0, offset 0, flags [DF], proto TCP (6), length 60)
    20.205.243.166.80 > 10.1.13.50.38376: Flags [S.], cksum 0x69ba (correct), seq 3753100548, ack 1489092903, win 65535, options [mss 1436,sackOK,TS val 3712395681 ecr 4097437351,nop,wscale 10], length 0
16:09:38.848212 Out ethertype IPv4 (0x0800), length 68: (tos 0x0, ttl 64, id 15216, offset 0, flags [DF], proto TCP (6), length 52)
    10.1.13.50.38376 > 20.205.243.166.80: Flags [.], cksum 0x1fcd (incorrect -> 0x9613), seq 1, ack 1, win 501, options [nop,nop,TS val 4097437456 ecr 3712395681], length 0
16:09:38.848318 Out ethertype IPv4 (0x0800), length 146: (tos 0x0, ttl 64, id 15217, offset 0, flags [DF], proto TCP (6), length 130)
    10.1.13.50.38376 > 20.205.243.166.80: Flags [P.], cksum 0x201b (incorrect -> 0x9f0a), seq 1:79, ack 1, win 501, options [nop,nop,TS val 4097437456 ecr 3712395681], length 78: HTTP, length: 78
        GET / HTTP/1.1
        Host: www.github.com
        User-Agent: curl/7.68.0
        Accept: */*

16:09:38.954152  In ethertype IPv4 (0x0800), length 156: (tos 0x0, ttl 48, id 45056, offset 0, flags [DF], proto TCP (6), length 140)
    20.205.243.166.80 > 10.1.13.50.38376: Flags [P.], cksum 0x024d (correct), seq 1:89, ack 79, win 64, options [nop,nop,TS val 3712395786 ecr 4097437456], length 88: HTTP, length: 88
        HTTP/1.1 301 Moved Permanently
        Content-Length: 0
        Location: https://www.github.com/

16:09:38.954207 Out ethertype IPv4 (0x0800), length 68: (tos 0x0, ttl 64, id 15218, offset 0, flags [DF], proto TCP (6), length 52)
    10.1.13.50.38376 > 20.205.243.166.80: Flags [.], cksum 0x1fcd (incorrect -> 0x949a), seq 79, ack 89, win 501, options [nop,nop,TS val 4097437562 ecr 3712395786], length 0
16:09:38.954884 Out ethertype IPv4 (0x0800), length 68: (tos 0x0, ttl 64, id 15219, offset 0, flags [DF], proto TCP (6), length 52)
    10.1.13.50.38376 > 20.205.243.166.80: Flags [F.], cksum 0x1fcd (incorrect -> 0x9498), seq 79, ack 89, win 501, options [nop,nop,TS val 4097437563 ecr 3712395786], length 0
16:09:39.060177  In ethertype IPv4 (0x0800), length 68: (tos 0x0, ttl 48, id 45057, offset 0, flags [DF], proto TCP (6), length 52)
    20.205.243.166.80 > 10.1.13.50.38376: Flags [F.], cksum 0x95e2 (correct), seq 89, ack 80, win 64, options [nop,nop,TS val 3712395892 ecr 4097437563], length 0
16:09:39.060221 Out ethertype IPv4 (0x0800), length 68: (tos 0x0, ttl 64, id 15220, offset 0, flags [DF], proto TCP (6), length 52)
    10.1.13.50.38376 > 20.205.243.166.80: Flags [.], cksum 0x1fcd (incorrect -> 0x93c4), seq 80, ack 90, win 501, options [nop,nop,TS val 4097437668 ecr 3712395892], length 0
16:09:46.177269 Out ethertype IPv4 (0x0800), length 76: (tos 0x0, ttl 64, id 38621, offset 0, flags [DF], proto TCP (6), length 60)
 System Area Network(系统域网):主机及外设
Local Area Network(局域网):以太网
Metropolitan Area Network(城域网):WiMax
Wide Area Network(广域网):因特网,X.25
System Area Network(系统域网):主机及外设
Local Area Network(局域网):以太网
Metropolitan Area Network(城域网):WiMax
Wide Area Network(广域网):因特网,X.25


 1字节=1B,1024B=1KB
 我以为我是修改错文件了,但是好像没怎么简单
 后来发现原因是,变量这一行不要加注释
guest_enable=YES
后来发现原因是,变量这一行不要加注释
guest_enable=YES 
 这很明显是没有指定用户
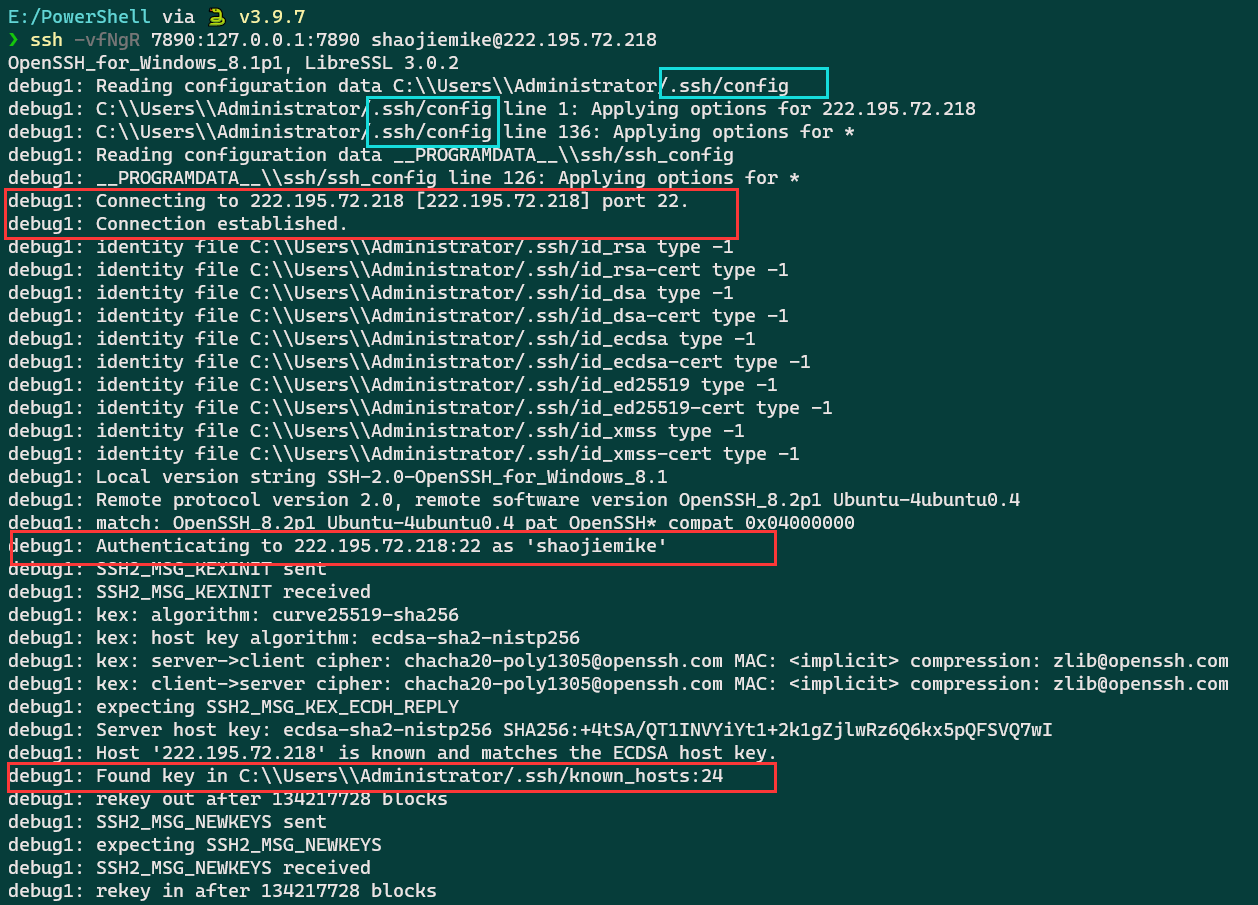
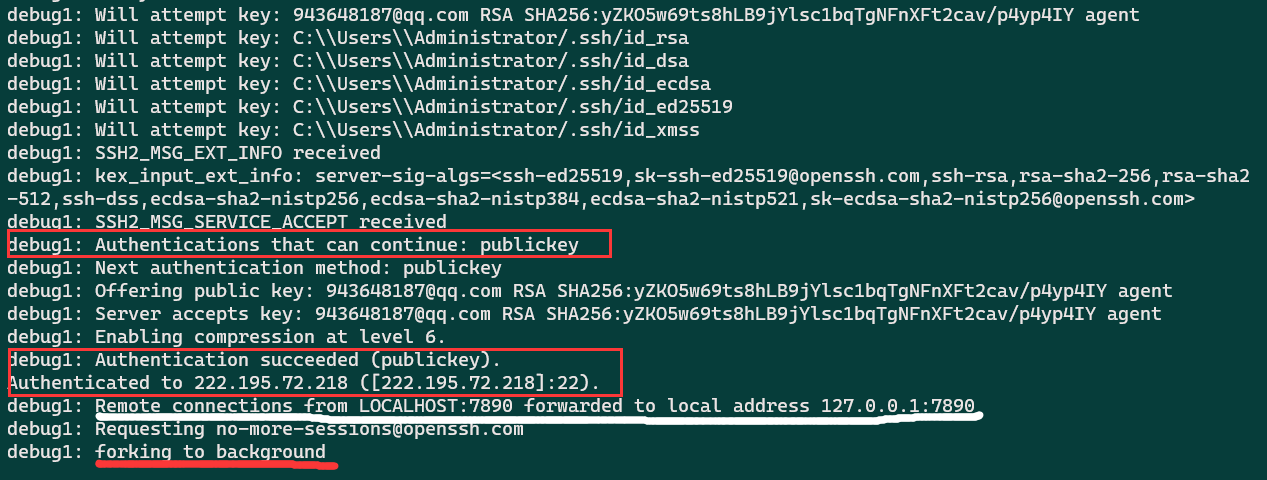
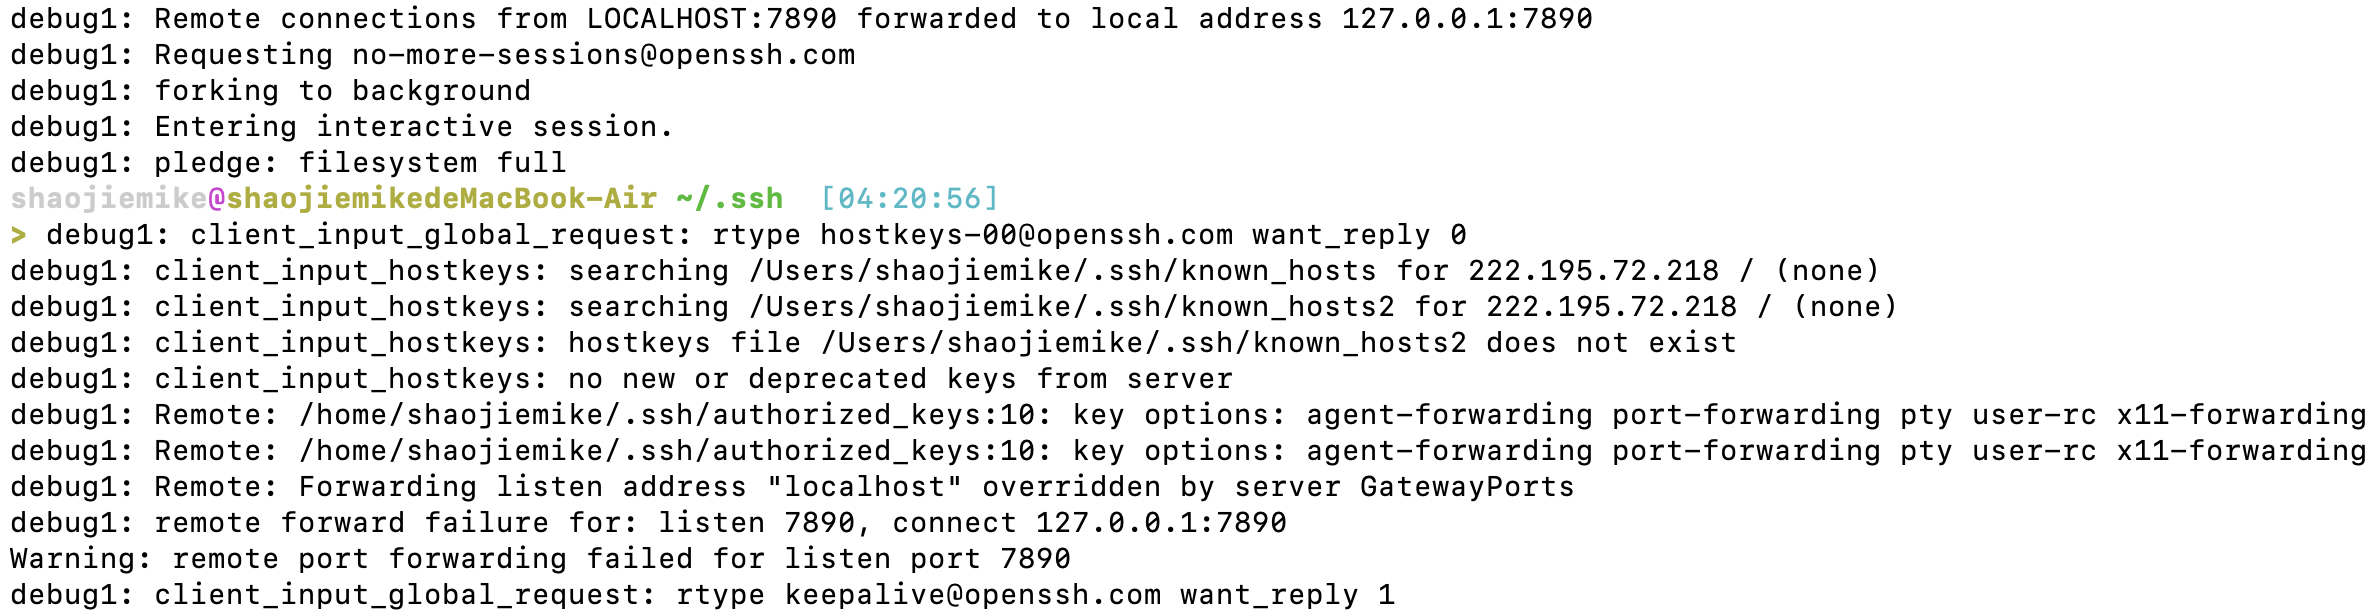
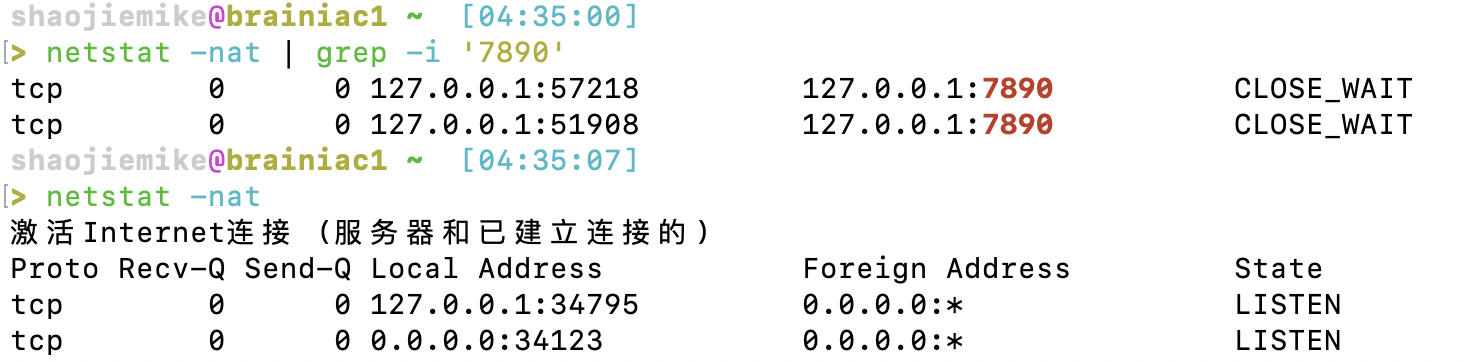
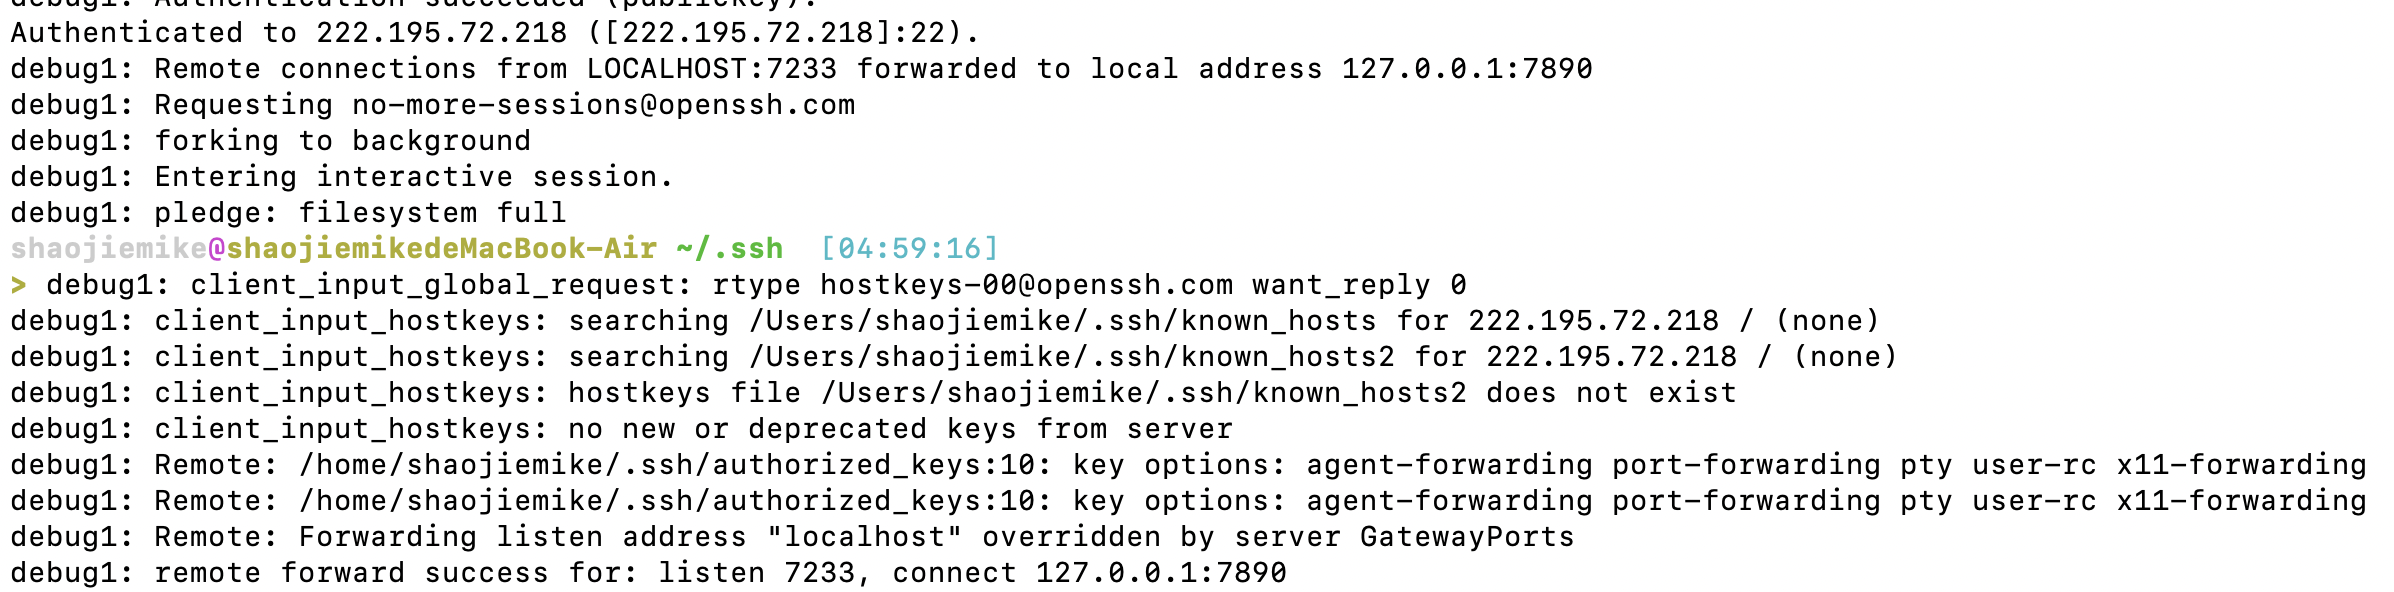
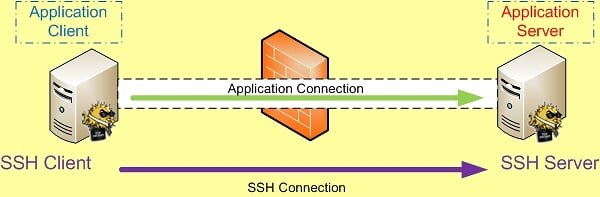 本地转发在本地这台机器上监听一个端口,然后所有访问这个端口的数据都会通过ssh 隧道传输到远端的对应端口上。命令中的 host 和
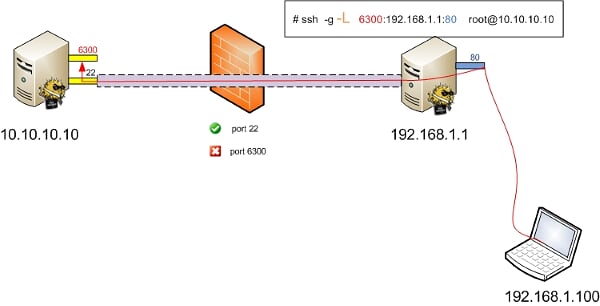
 2. wget验证
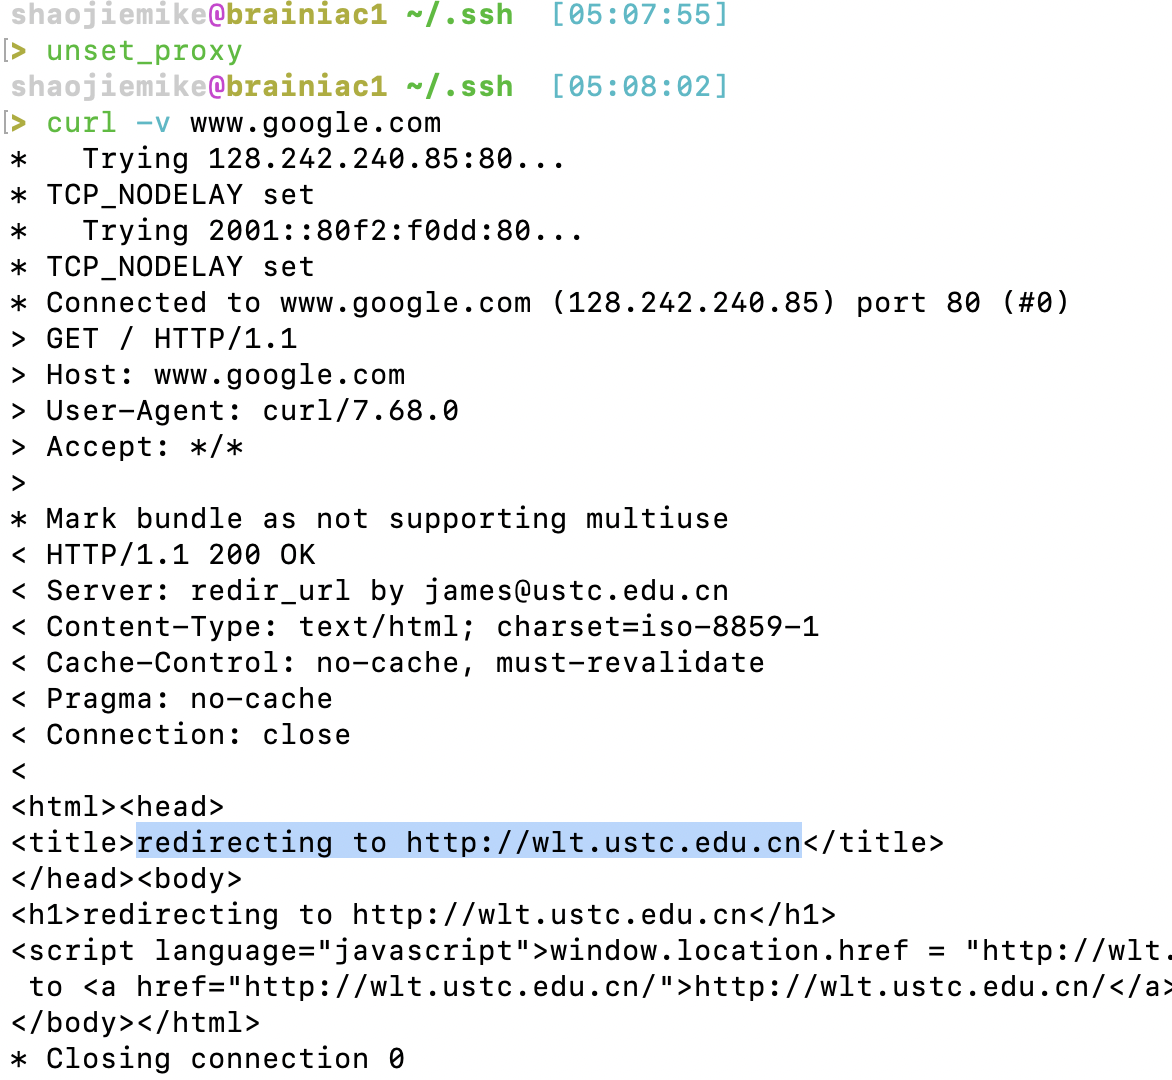
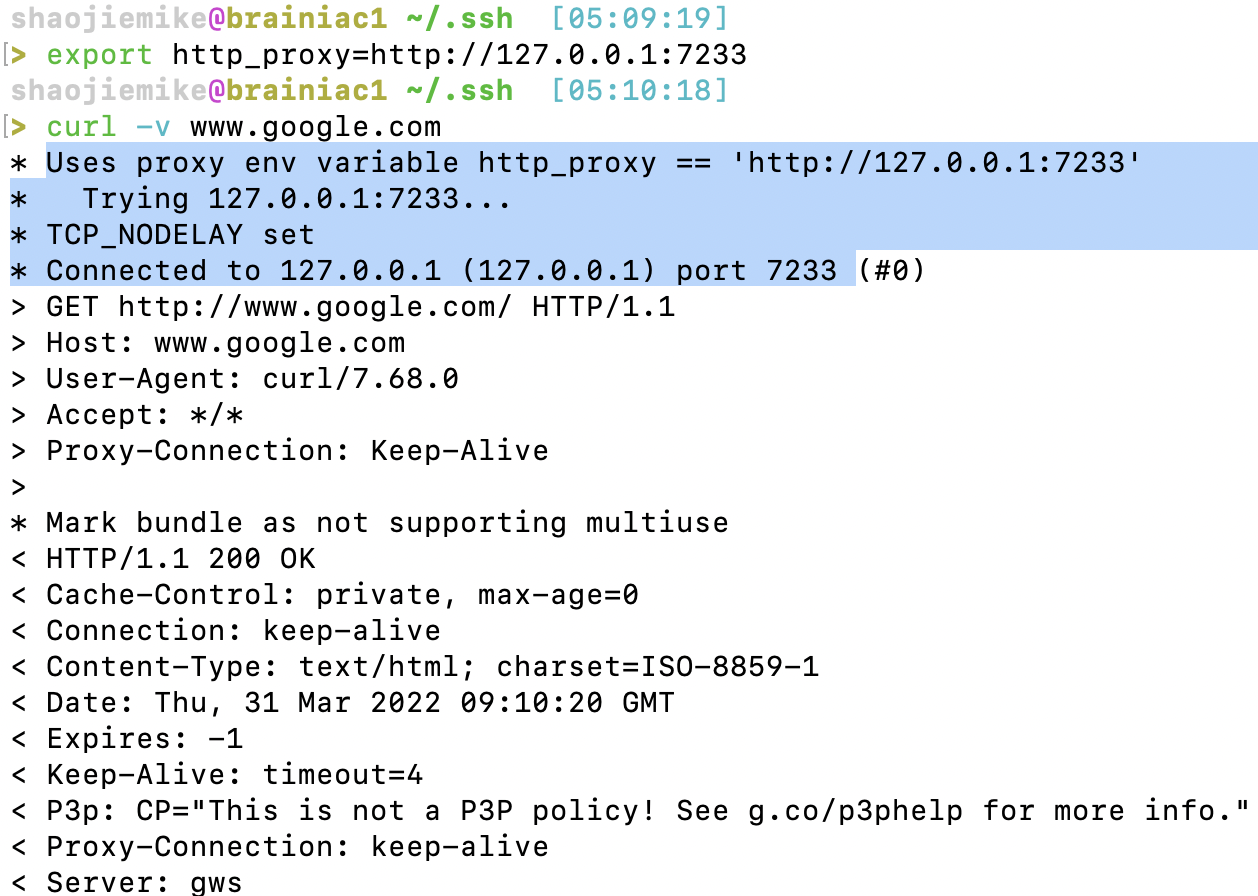
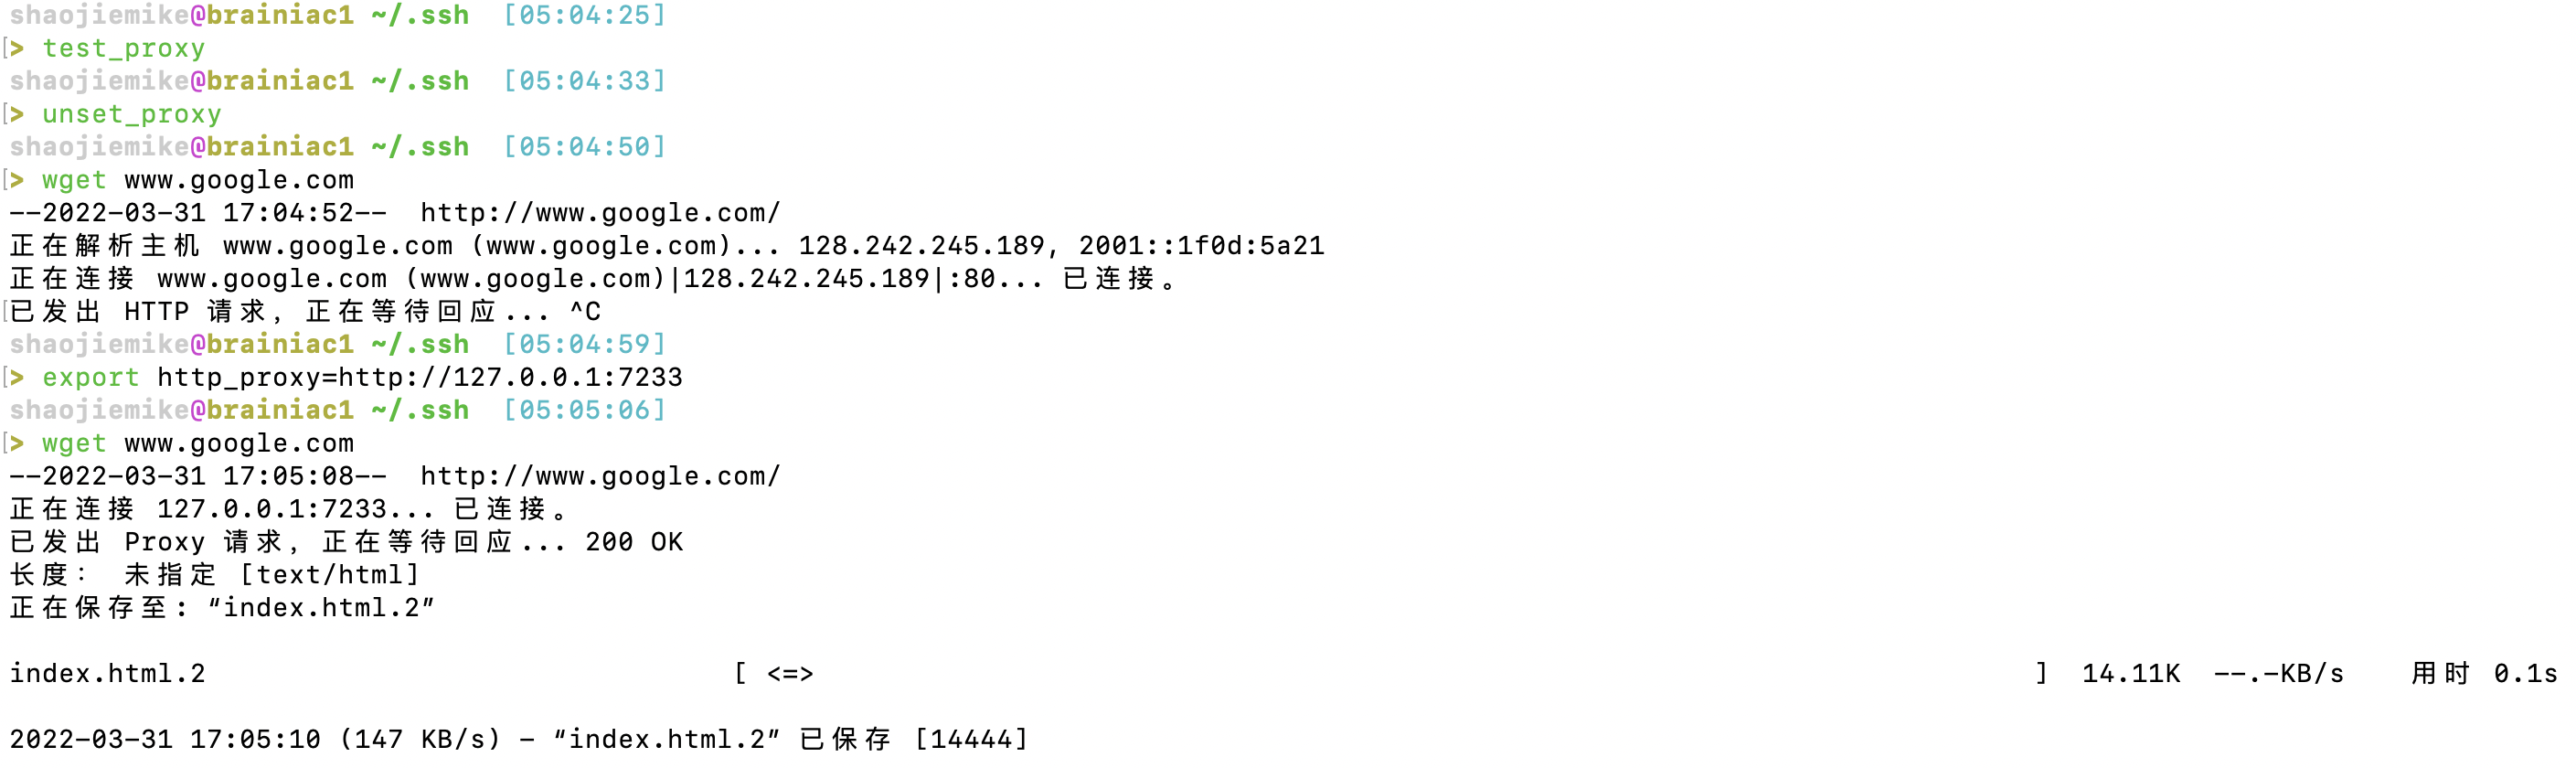 3. curl验证(原本会走WLT)